
First Things First, Go To The Events Module
The Events module is found in the main navigation next to the Membership module:

To add an Event Item select "Add an Event" from the left-hand menu:

Add An Event
"Add an Event" screen will appear as shown below. It consists of 8 tabs of information. Only the first tab contains mandatory fields, while the others are optional, except for the Refund Policy field in the Ticketing tab.
There are two types of events: Registration-Only Events and Ticketed Events. A Registration-Only Event does not require payment, whereas a Ticketed Event requires payment.
Note: Depending on your module settings you may not see the Registration or Ticketing Tabs.

- General
- Location
- Images/Documents
- Contact
- Security
- Other
- Registration
- Emails
- Ticketing - For Ticketed Events
- Forms - For Ticketed Events
- Certificates
- CPD
- Watch Video Tutorial
General

- Event Name - name of your event
- Event Start Date - start date of your event
- Start Time - start time of your event
- Event End Date - end date of your event
- Event End Time -end time of your event
- Recurring Event - for more details on this feature, please see here.
- Event Timezone - this will default to your Site Time Zone but can be changed per event.
- Event Type (optional) - use the dropdown option to select the created event types.
- Event Short Description - max 500 characters (optional) - this will be displayed on the event list page
- Event Long Description (using Content Editor) - This will be displayed on the individual event page
- Event Categories (optional)- this option requires a 'site-wide categories' module.
Location

-
- All event location details: this will be shown with a Google Map link on the event display if an address is entered.
- After entering the address, the map automatically assigns the latitude and longitude. Additionally, you have the option to manually drag the pin to the accurate location.
- If your event is an online meeting/webinar/training, you can add the URL in to the "Video conferencing/meeting link" field, and this will be displayed in the event details, and also emailed to the registrant and displayed in their "my events" members area.
- Note: This information will not be displayed until the person has registered or paid for their ticket.
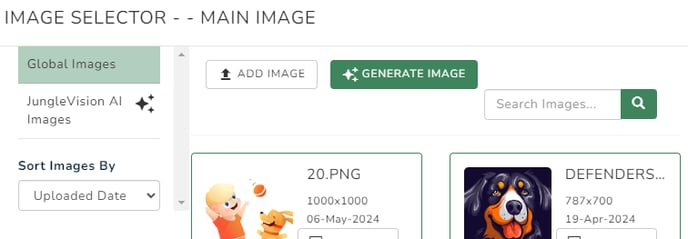
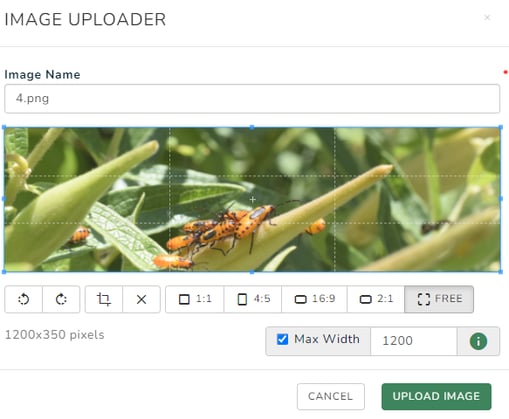
Images/Documents
Upload Images, thumbnail images and pdf documents to the event here if required. The Main image size is displayed on the individual event page (recommended 800px x 400px) , and the thumbnail image is displayed on the events list page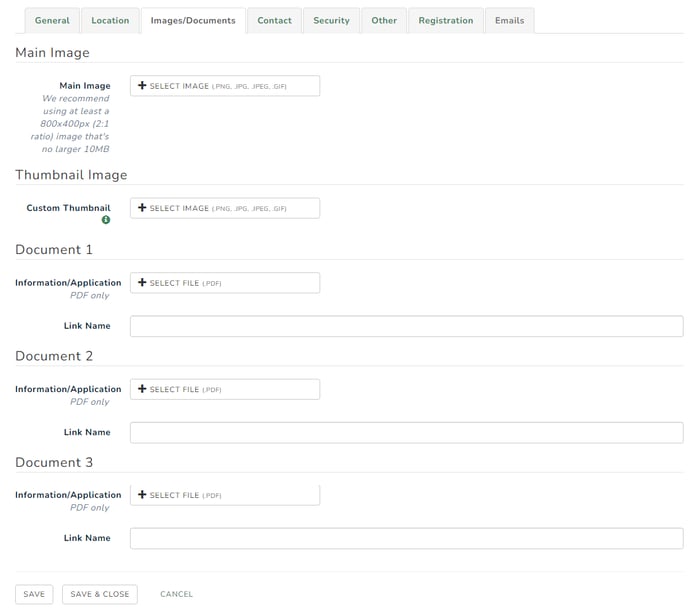
You can either upload an image from your computer or use JungleVision AI to generate one. Additionally, you can resize your image to the recommended dimensions.
Contact Details

- All of the details for the contact person for this event. If an email address exists in 'Contact' then only that email will receive a notification when someone registers. The WebMaster contact in 'Site Details' will not receive an email notification
- If a contact email address doesn't exist in 'Contact' then only the WebMaster will receive an email notification when someone registers.
Security
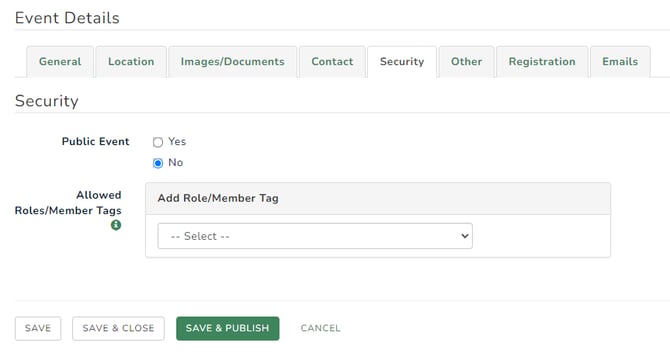
- You have the option to designate an event as 'public' or 'not public.' If you choose not to make the event public, you can then select specific 'roles and tags' to grant access to the event.
- Use the dropdown option to select 'roles and tags'.
For this to work you need to make the 'Events page' that is linked to the Events module public, and then edit the Security on any existing 'Events'.
Other
This tab gives some optional fields to add additional information to your event
Registration


- If you wish to take online registration please select “yes” for "Allow Online Registration"
- If you want to accept online payments, select 'Yes' for 'Accept Online Payments' to make the event a ticketed event. Two new tabs, 'Ticketing' and 'Forms,' will appear.
(**Note** having this set to no, when online registration (above) is turned on, will collect an RSVP/Registration for attendees, but not take payments) - Share Registrations option is used to allow members to see other attendees on the website and in the Member Jungle App
- Display Remaining Availability: this option allows you to show how many tickets or registration spaces are available on the front of the website (as in the screenshot below). As this number will differ if you are logged in and if there are restrictions on tickets there are a number of rules in place.
- If there are restricted tickets only, it will just use the Purchase Tickets button and ask you to login, as the number of tickets available will be dependant on your access.
- If there are public tickets and restricted tickets, the number will show the public tickets, but you will be able to see more when you login if they are available to you.
- If there are no public tickets available but some restricted it will show Purchase tickets button, as there may be some available to you when you login.
- If there are no tickets of any type available it will show as sold out
- If any of your event ticket types don't have a limit on availability, ticket availability will not show.

- Sold Out Text: If your event has no tickets available, this text will display on the front of the website. If you leave it blank it will simply show as sold out.
- Register Button Text: This text allows you to control the "Purchase Tickets" wording on the website and the mobile app (as shown above as "Tell us your coming".
- Enable Linked Chatroom: Creates a chat room for all members that have registered or purchased tickets to this event. In a chat group, only the registrants, site administrators, and event coordinators would have visibility and access to the chat content. Other members or users would not be able to see or interact within the chat group. This restriction ensures that only authorised individuals can view and engage in chat conversations.
- Linked Chatroom End Date: The date and time that the chatroom for this event will expire. If left blank, the chatroom will automatically expire 7 days after the event end date.
- Maximum Registrations: Set the maximum amount of people that will be allowed to register for this event.
Note: This works with online registrations only, and will not work with online payments/ticketing, as this has its own max limit settings
- Registrations Open field is used to set a date that the registration or ticketing will be available for members.
- Registrations Close field is used to set a date that the registration period is closed.
- Registration message: here you can construct a message that is displayed to the users after a successful event registration and is also included in the registration email that is sent to your members.
- Send Email on Registration: if set to yes, this option will send an email to the registrant along with the Registration Message above.
- For more information on event registrations see "Taking Online Registrations below"
Once completed, hit save and close. For more details on how to manage your events, please see here.
Watch Video Tutorial
Return to Events Main Help Document.