
What Is PowerData Forms
The PowerData Module allows you to create your own forms on your website so you can
- Collect custom information per form.
- Be notified by email when someone completes a form by email.
- Access all of the form submissions from your website and export them to csv.
- Run reports on your form submissions and email people individually or as a group.
This help document includes:
- Adding a New Form
- Cloning A Form
- Explanation of Field Types
- Editing a Form
- Setting up Administration and Response Emails
- Button Meanings
Accessing the PowerData Module
To access the PowerData Module, you will need to click on the Modules tab in the top menu and select PowerData Forms from the list.
Please note that this module is only available to selected packages. Please send a support ticket for more details.
Add a New Form
When you click on the PowerData Module, you will see a list of forms that you may already have on your website. To add a new form, click on the "Add Form" button located in the left navigation.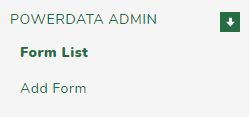
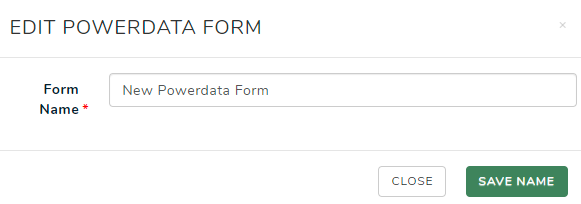
You will then need to give your new form a Name. Enter the name and click ‘SAVE NAME’.
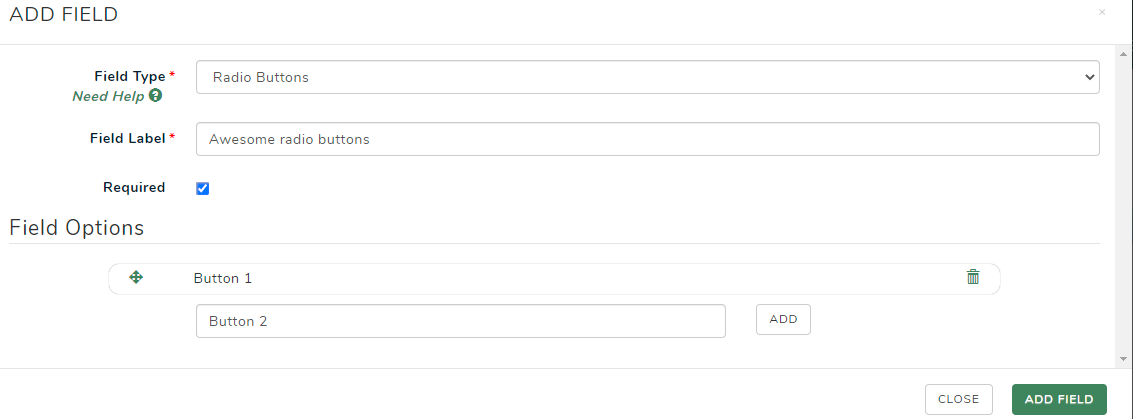
Next, you will be prompted to add form fields. There are many options for form fields, some of which also have field options like Radio Buttons. Once ready, click ADD FIELD to save the first field. For an explanation of all field types, please see below.
To add additional fields, click 
You can reorder the fields by click and dragging the plus icon in the top left of the field.
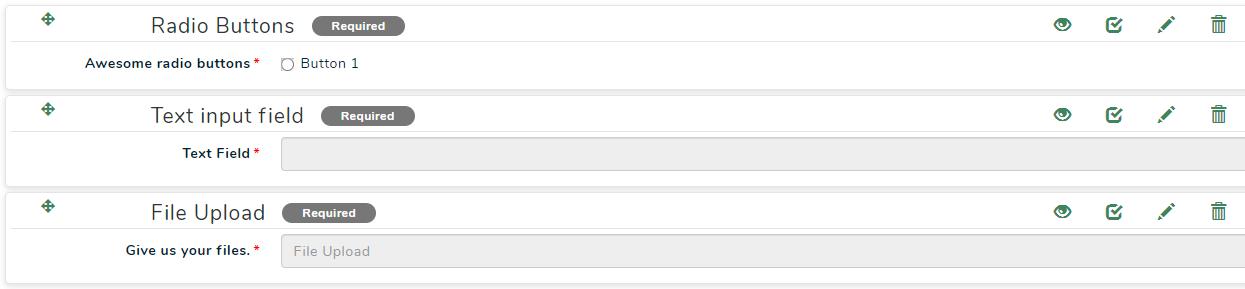
- The eye icon will show or hide the field preview.
- The tick box will activate or deactivate the field.
- The pencil icon will open the edit context.
- The trash can will delete the field.
Clone A Form
To create an exact clone of a Powerdata form, you can select the Clone icon located on the far right of the forms list.

This will take you directly to the form settings for you to name your new Cloned form, and make any changes to the settings or fields as required.
Explanation of Field Types
Captcha: If you have a captcha field on your form, it will help reduce SPAM and prevent robots from sending dummy submissions.
Checkboxes: This allows you to create a number of different options and let users tick multiple options. If you select this type, it will give you an additional section for you to add your “Field Options”. Type the option name into the input field and click “Add” it will appear in a list below. If you wish to re-order the fields, click on the arrow located to the left of the field and drag it to where you would like it to be. To delete a field, click on the rubbish bin icon on the far right of the field.
Date: A simple date field with calendar selector
Email Address: The email address of the user.
File Upload: This allows people to upload a file.
HTML Content: This field type allows you to write more detailed content or insert links and documents.
Horizontal Lines: This is just a visual line that will appear on your form to break up the content.
Image Upload: This allows users to upload an image.
Numeric Input Field: This field will only allow numbers, if a user tries to submit a form with any other characters, they will be prompted to change their entry.
Phone Number: A field to add a phone number.
Plain Text Memo Field: This is a field that allows users to input long text answers, i.e. descriptions, comments, etc.
Radio Buttons: This option allows you to create a number of options and ask members to select one. If you select this type, it will give you an additional section for you to add your “Field Options”. Type the option name into the input field and click “Add” it will appear in a list below. If you wish to re-order the fields, click on the arrow located to the left of the field and drag it to where you would like it to be. To delete a field, click on the rubbish bin icon on the far right of the field.
Section Headings: This will allow you to create a heading to format your form into easier-to-read sections.
Select Box: This type will allow you to create a dropdown list of options and allow users to select one from the list. If you select this type it will give you an additional section for you to add your “Field Options”. Type the option name into the input field and click “Add” it will appear in a list below. If you wish to re-order the fields, click on the arrow located to the left of the field and drag it to where you would like it to be. To delete a field click on the rubbish bin icon on the far right of the field.
Text Input Field: This is the basic form field which allows users to enter text information.
Time: A time field.
Yes/No Radio Buttons: An easy way to add a Yes and No button option which allows users to select one option.
Once you have completed the details above click on the "Add Field" Button.
The field will be instantly added and live on your form.
Editing Form Settings
To edit the settings of a form, click on the edit icon  next to the form name.
General Form Settings
The general settings include the
Form Name - the name of the form that you use to identify it from an administration perspective.
Text to display on Submit Button: The name of the submission button i.e. "Give your Feedback now" or "Contact Us" or "Submit Enquiry"
Successful Submission Message: The message that is displayed on the screen one a person submits a form.

Admin Email Settings
The admin email settings control if an email is sent through to your administration team when a form is submitted what and who it is sent to.
Send Admin Email: If you wish to receive notification when a form has been submitted, you must tick this box and then configure the additional settings.
To: Choose who you wish to receive the administration emails, you may have the form go to multiple people by adding an Email Address and then clicking +. You can also edit and delete these emails if required.
Email Subject: This is the subject line that will appear in administrators' emails when this form is submitted. It's a good idea to include the form name in this subject.
Email Message Content: You can choose what information is in the emails that are sent to administrators using the editor here. You can choose to include a login link as in the example below.
Include Submitted Data in Email: If you want all of the information that was submitted in the form included in the email, tick this box. Otherwise, this information is available in the Powerdata administration area.

Response Email Settings
You can also configure the system to send a copy of the form submission to the person who submitted the form for their records and to confirm that their submission has been received. This will only work if you have an email address field in your form, or the person is logged in when submitting a response.
Send Responder Email: If you wish to email the person who submitted a form on your website, tick this box.
To: Select from the dropdown box which email address the form will go to, if the form is on a restricted page or the person is logged in when submitting it, you will be able to select "Auto - Logged in Member", otherwise select from any "Email Address" fields that are included in your form as the reply to address.
Email Subject: This is the subject line that will appear in your email.
Email Message Content: You can choose what information is in the emails that are sent to everyone who submits your form.
Include Submitted Data in Email: If you want all of the information that was submitted, email included in the email, tick this box.

Button Meanings
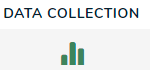 The DATA COLLECTION button will display any form submissions and allow you to run any reports or export all your collected information.
-3.png?width=64&name=rtaImage%20(5)-3.png) The edit icon allows you to edit the field properties.
The edit icon allows you to edit the field properties.
-3.png?width=73&name=rtaImage%20(3)-3.png) The ACTIVATE icon allows you to inactivate the fields. If the icon is a green tick, this means that this field is currently active on your membership form. Click on this icon to deactivate the field.
The ACTIVATE icon allows you to inactivate the fields. If the icon is a green tick, this means that this field is currently active on your membership form. Click on this icon to deactivate the field.-3.png?width=74&name=rtaImage%20(4)-3.png) If the ACTIVATE icon is red, then this field is currently inactive on your membership form. Clicking on the icon allows you to activate the fields.
If the ACTIVATE icon is red, then this field is currently inactive on your membership form. Clicking on the icon allows you to activate the fields.
 SHOW IN MODULES MENU will list the form name in the MODULES menu. You may like to enable this option for forms that have many submissions. The Modules menu link will take you directly to the Data Collection page for that form.
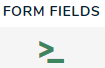 FORM FIELDS button allows you to edit, add, and remove fields for that form.
-3.png?width=67&name=rtaImage%20(6)-3.png) The DELETE icon allows you to delete the field. NOTE: This will delete all data that has ever been stored in this field, plus remove the field from current application forms.
The DELETE icon allows you to delete the field. NOTE: This will delete all data that has ever been stored in this field, plus remove the field from current application forms.
Reviewing Form Submissions - Data Collection and Reporting
By default, form submissions will be emailed to the main email address that is stored in the contact details on your website. If you would like to customise who will receive submissions on the form, you can do this by editing the form settings. See above Editing Form settings heading.
You can access your form submissions in one of two ways:
- Click on Modules in the top navigation bar, and your form name will appear in the list of modules
- Click on Modules in the top navigation bar and click on PowerData Forms, and then click on the Data Set Reports in the left navigation. Click the graph icon next to the form you wish to view submissions on.
You will be taken to a screen that shows all of your form submissions as shown below.

To begin customising your report, select the Powerdata form from the top dropdown menu for which you wish to view and report on.

Once a form is selected, you have the ability to filter on all of the fields that are included in your form, as well as Submission Date and IP Address. You can choose from any of the options and search to find the required results.

Furthermore, you have the flexibility to include additional fields for display on your dashboard by selecting on the right which fields you wish to display on your screen (and also in your download).
Exporting Form Submissions
Once you have completed a search (as shown above) and found all of the required results, you can export all of our submissions into a CSV file by clicking the "Export Report to CSV" button on the top left of the Data Reports Menu.
There are three options for the CSV
Export Displayed Fields: This will export all of your returned search results and only show the fields you have selected to appear on your screen.
Export all Fields: This will export all of your returned search results with all fields that are in the relevant PowerData form.
Export all Fields Including Demographics: if your form is on a restricted page and people need to be logged in to access it, this report will also have all demographic and membership information, as well as all fields included in your form.

Emailing People Who Have Submitted a Form
As well as the automated responder email mentioned above, you can email everyone who has submitted a form via the Powerdata Reports/Data Collection area.
Provided that you have included an "Email Address" field in your form or have the form restricted so that people have to be logged in to submit, you will be able to email members either in bulk or individually from this screen.
Individually Emailing: If you wish to send an email to an individual, click on the Email icon located to the right of the form submission. You will see the email screen as shown below and be able to choose to send it To: any of the email address fields that are included in the form.

Bulk Emails: Alternatively, if you wish to email everyone that is in your search results, you can click on the Email Members button at the top of the screen.

You will then be taken to a screen where you can draft and send your email.
NOTE: Demographic fields are only available if the submission contained account creation fields or if the member was logged in when submitting the form. IF you insert any of the fields on the right into your email and there is no information, the email will have blank sections.

There’s an option to insert a snippet and manage your recipients by clicking 'View and Manage Recipients.' You can delete any recipient if needed, and click 'Restore' to revert to the original recipient list.

At the bottom left corner of your screen, you can preview the email, send a test, and then send it to your recipient list.

Sharing Powerdata Report
To share your customised report with club administrators who have the appropriate membership access, click the "share" button. This action will trigger a pop-up message to appear, guiding you through the sharing process. Membership Administrators can access the identical dashboard through the shared link.
NOTE: If you wish to Save the report for future use, you can also bookmark the link from the "Share Report" button so that you can go back to the exact filters in the future.


Adding a Form to a Page
To display a form on a page, you will need to create a page on your website for the form to go.
Once you have a page ready, you can add the form as a Widget.
To do this:
- Go to the pages administration area.
- Click the Widgets icon next to the page you would like to add the form to.
- Click the
-4.jpg?width=119&name=rtaImage%20(4)-4.jpg) button.
button. - Scroll down to Powerdata Forms in the list, and select the Add Widget button next to Power Data Form on the right of the pop-up.
- You can then find the Powerdata form widget on your list of widgets on the screen, and click on the cog.
-4.jpg?width=688&name=rtaImage%20(5)-4.jpg)
- Select the PowerData form name from the drop-down list. If you would like a heading above the form, then include this text in the Form Header Text field.
- Click Save
- Your form will now appear on the page.