If you have specific information that you wish to collect from those purchasing tickets for your event, you can create a custom even registration form.
Note: A custom form, is available only for ticketed events. The event forms are completed per transaction regardless of how many tickets are purchased, if you wish to collect specific details for each ticket holder i.e. Name or Dietary Requirements you need to use ticketing fields.
To do this, create your event as normal (see Add or edit an event using the Events Module ) and in the Registration tab, select Yes for Allow Online Registration, and then select Yes for Accept Online Payments.

Complete the opening and closing dates of registration (as a minimum), and click save.
Upon clicking save, a Form tab will appear. Select this tab.

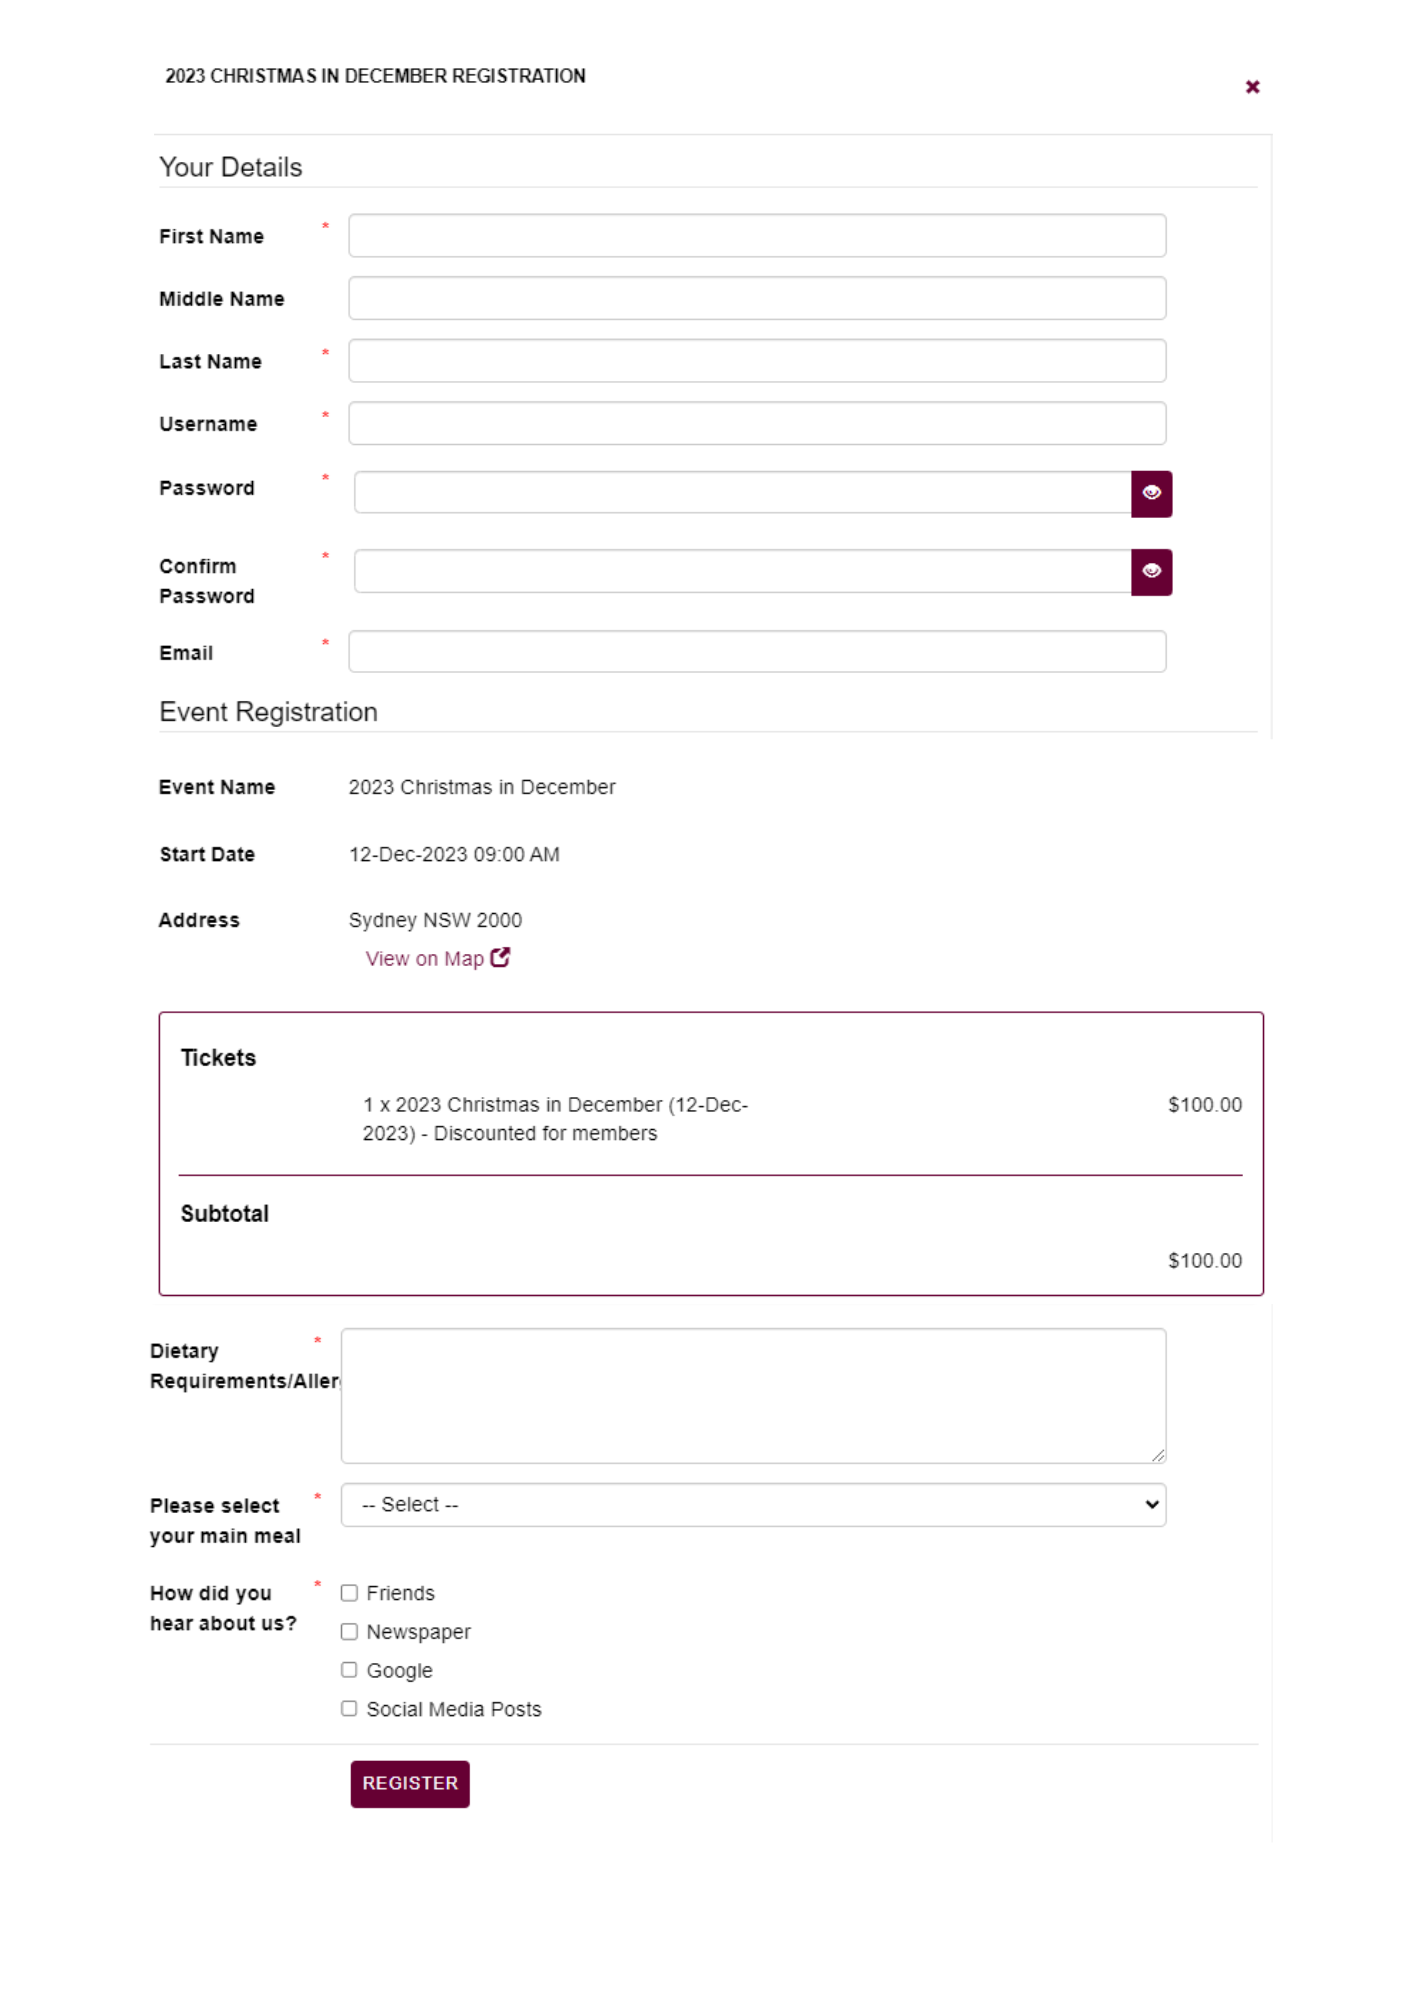
The form will include the Your Details section, which is a minimum requirement to create/log in to a users account.
ADDING FIELDS TO THE FORM
- Select the
 button at the top right of the page.
 - A pop up will appear, where you can select the field type from a drop down list, and include the field label.
- Check the relevant box, as to if the field is required by the user.
- Click Add Field.
.jpg?width=688&name=rtaImage%20(49).jpg)
- Add as many fields as you require.
RE-ORDERING FIELDS
You can reorder the fields in your form, by clicking on the ![]() in the left corner of the field, and dragging it to its new location, and dropping it.
in the left corner of the field, and dragging it to its new location, and dropping it.
You cannot reorder the My Details section. This will remain at the top of the form.
EDITING FIELDS
![]()
To edit a field, click on the edit icon  next to the field you wish to edit. This will re-open the pop up for you to make any changes required.
DELETING FIELDS
To delete a field, click on the trash can icon  next to the field you would like to delete.
ACTIVATING OR DEACTIVATING FIELDS
To activate or deactivate a field, click on the activation button  on the field you wish to adjust. If the square is red, this indicates that the field is deactivated. If the square appears green, this indicates an active field.
A deactivated field will not show in the live form for users to see.
SHOW/HIDE FIELD PREVIEW
If you have a lengthy form, you can select to hide the field preview. This is for the administration view only, and will not be the case when live and being viewed by users.
To hide a field preview, click on the eye icon next to the field  this will minimise the field and show only the heading or field type.

To expand the field again, click on the  and the field information will show.
THE LIVE VIEW
Once you have completed your form fields. Return to the Details Tab, and click Save and Close.
When your registration opening dates are open, the users will see a Register Button .jpg?width=338&name=rtaImage%20(50).jpg) on the event page.
on the event page.
Upon clicking the button, they will be taken to a pop up screen with the registration form.