Site and Organisation Settings
This contains your Site and Organisational details as well as details on Authorised Contacts, Payment Gateway Setup, Time zone, Tax information and SEO and Content Management.
Accessing Organisation Settings
Once logged in as a site administrator you can access Organisation Settings from the top right by clicking on the user icon.
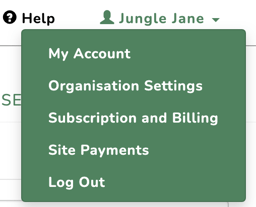
This section is where you can manage five areas of your site:
- Organisation Details
- Authorised Contacts
- Payment and Gateway Setup
- Tax and Compliance Information
- SEO and Other Content Management
Company/Organisation Details
The organisation details form is used for the setup of your website and website communication. You can edit these details by highlighting the field and typing the new information. When you have completed your edit, click Save.
- Short Name: Prefix only e.g. My Club.
- Company/Organisations Name: Full club or organisation name e.g. My Club PTY LTD.
- Organisation Identification Number: ABN/ACN/ARBN/NZBN, Association Number, etc.
- Organisation Identification Type: A drop-down option is available to select the type of identification used to register an organisation. Depending on your region, this may be a tax ID, registration ID, or another government-issued identifier. This will be displayed in the footer of your website.

- Website URL: This cannot be manually edited. If you would like your website name changed, please submit a support ticket.
- Website Name: Is displayed in terms and conditions, in some website footer designs and also can used to search for your organisation on the Member Jungle Mobile App. An acronym of this name will also be used in app push notifications.
- Website Contact Email: this is the default email address that all membership forms, catalogue orders and event registrations completed by Users are emailed to. This email address is also used on any site invoices sent from the store, membership, or any other modules that generate invoices. Contact emails sent via the Member Jungle App to Site Administrator also go to this address.
- Website Contact First Name: These Contact details are inserted on your page, when utilising the Contact Widget on your Website.
- Website Contact Last Name: These Contact details are inserted on your page, when utilising the Contact Widget on your Website.
Organisation Address
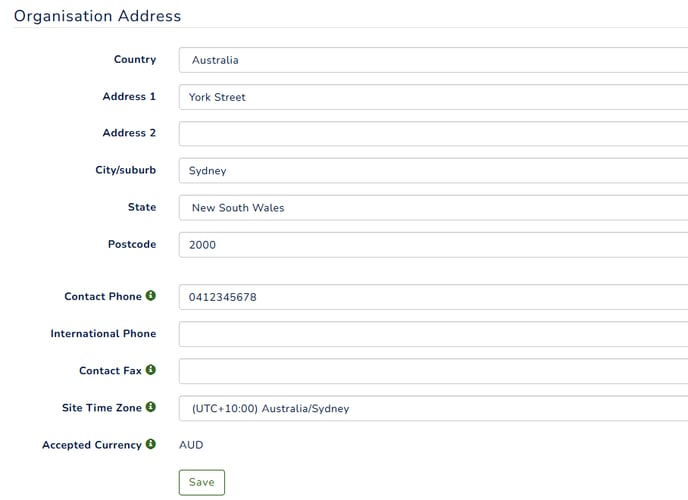
- Street Address 1: This is displayed on invoices and in contact details.
- Street Address 2: Available if required in case of first street address being 'Unit 1' for example.
- City/Suburb: Your club's suburb.
- State: Your club's state
- Country: Your club's country. Changing this setting also changes the currency used and availability of states.
- Postcode: Your club's postcode.
- Contact Phone: This phone number is displayed in contact details.
- International Phone: Optional if your club has an international phone number
- Contact Fax: Optional if your club uses a fax.
- Site Time Zone: This setting controls the display of time zones across your site, including for invoices, journals and timestamps throughout the system.
- Accepted Currency: The currency used for all payments and transactions in the system. Please contact us to update your accepted currency.
Authorised Contacts
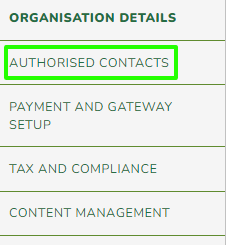
After clicking on "Organisational Details", in the left-side menu, you'll find the option for "Authorised Contacts". This area allows you to control 3 types of contacts:
- Site Administrators - This administration access gives full access above any module privileges in the Security Module, these users will have the ability to see all settings, modules, security and member information. The number of site administrators you are allowed is determined by your Member Jungle Subscription Package.
- Support Contacts - Nominated support contacts are the people you have selected who can raise support tickets and request assistance from the Member Jungle team on behalf of your organisation. The number of support contacts you are allowed is determined by your Member Jungle Subscription Package. If you have reached your plan limit and would like to add additional support contacts, please contact our team for a quote. We do allow limited numbers of support contacts above plan limits for a small additional monthly fee.
- Accounts - This is the person from your organisation who is nominated to receive all invoices, billing receipts and remittances advices. All sites allow only 1 account contact to be nominated.
Adding an Authorised Contact
To add a site administrator, the person must first have an account in the Security Module - see see how to Create a User Account
Type in the name of the person who you would like to add and they will appear in a dropdown list

Select the correct person, and then click "Add Site Administrator" or the relevant button.

Deleting an Authorised Contact
To delete an Authorised contact please click on the ![]() icon to the right of the person you wish to remove. You cannot delete yourself as a "Site Administrator".
icon to the right of the person you wish to remove. You cannot delete yourself as a "Site Administrator".
Auditing of all Changes to Authorised Contacts
All changes made to all three types of Authorised Contacts are audited and appear in the Security Module in the "System Report".

Payment and Gateway Setup
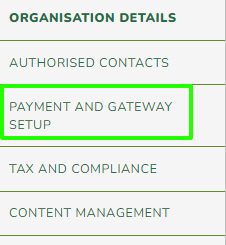
The Payment and Gateway Setup Module provides a direct link to setup your Member Jungle Payment Gateway Module as well as shows the Service Fees that apply to your site.
For more information see Member Jungle Payments Module
Service Fee Configuration
This area allows you to select whether you wish to "Absorb" or "Pass on" Service fees to the purchaser per module.
You can select the "Default Service Fee Type" which is used throughout the site and then overridge with different settings per module i.e. you may pass on all fees for membership transactions and absorb them for store/catalogue ones.
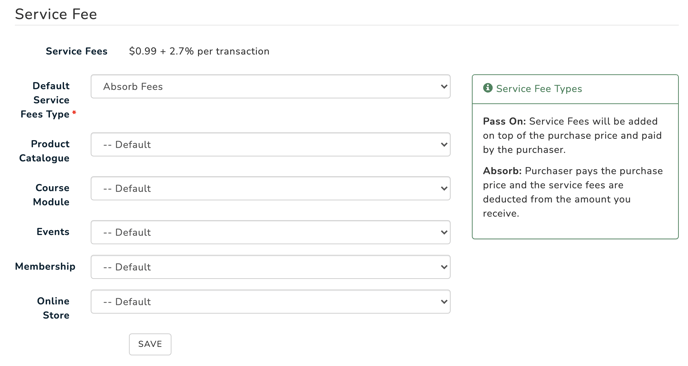
Absorb - Purchaser will pay the purchase price and the service fees will be deducted from the amount your organisation receives.
Pass on - all service fees will be added on top of the purchase price and paid by the purchaser.
NOTE: If you are using the Member Jungle Payment Gateway, the entire fee (service fee and platform fee) can either be passed on to members or absorbed by your club. However, if you are using your own Stripe gateway, you have the option to either pass on the Member Jungle Service Fees to members or absorb them within your club. For information on passing other fees, such as Platform/Stripe Fees, onto members, please see more details here: Payment Settings
Click Save to save any changes you have made to the Services Fees
External/Xero Account Code
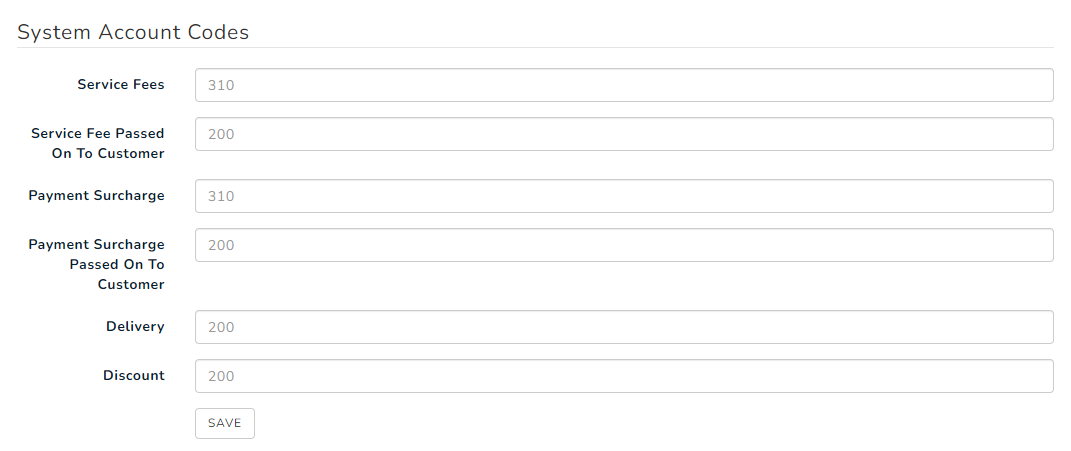
You can enter the relevant account codes used for the following income and expenses. Entering this code will enable you to run Xero/Accounting exports from the Site Payments Report and Member Payment Report.

After setting up your account code, you can now import your invoices into Xero or other accounting platforms. Please see more details on Payment Reports and Export to Accounting
System Account Codes
The grey codes are the default codes that will be used for the export process. However, they can be modified or replaced with custom codes as needed. This allows you to customize the export to match your specific requirements and accounting practices.
To override a default code, you can simply replace the grey code with the desired code. This customization feature enables you to tailor the export to accurately reflect your organization's financial structure and reporting needs.
Tax and Compliance
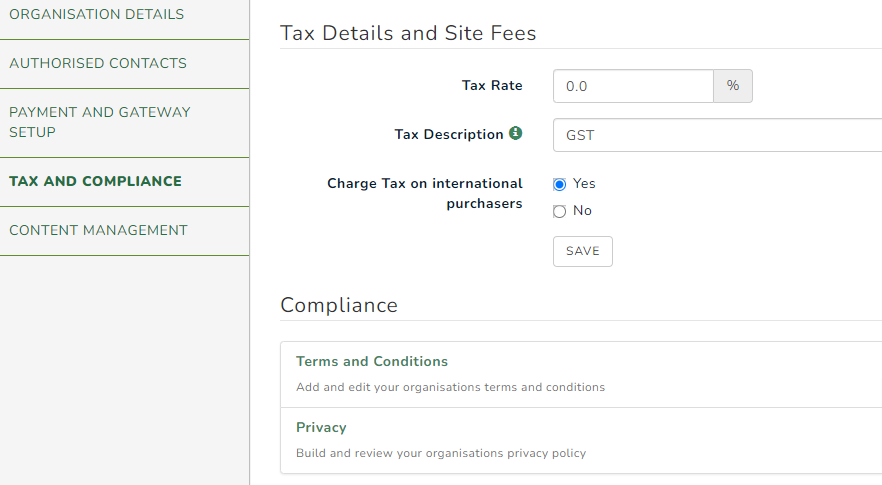
The Tax and Compliance section allows you quick access to setup your Tax Name and Rate as well as edit your Site Terms and Conditions and also Privacy Policy.
Tax Details
Tax Rate: This Tax Rate will be used for all invoicing on your site. There is the option in the Product Catalogue and Store for different tax rates per product as well.
Tax Description: This is the name of your relevant tax rate i.e. GST. If your organisation doesn't not charge any tax, please make sure the Tax Rate is left blank.
Charge Tax on international purchases: Yes/No. If you have international purchasers, set this option to 'Yes' if they should pay tax on purchases.
Click Save after making any changes to your Tax Details.
Note: Once you set your GST to 10%, all prices on your site will already include GST. While the prices will remain unchanged, invoices will separately itemise the 10% GST component, along with any other fees. You have the option to adjust your membership and other prices by 10% to accommodate the tax, if necessary.
Compliance
Both Terms and Conditions and Privacy are module pages on your website which are initially setup as non navigable and linked to in some footer designs.
To view your Terms and Conditions or Privacy Policy, please click on the button and it will open in a pop-up window for you to preview. If you wish to edit the policy, please click on the "Edit" button in the bottom right of the screen and it will take you to the page management area.
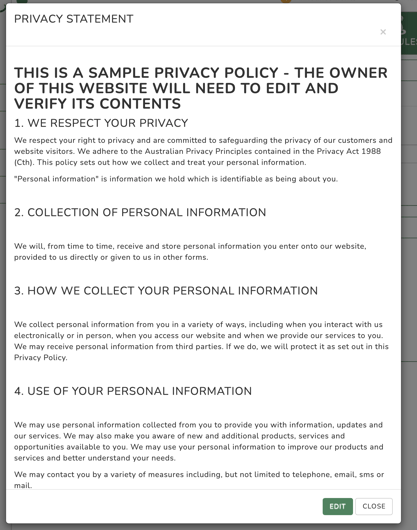
You will need to review the Sample Policy and verify and add your own information.
The Terms and Conditions Policy can be linked to from the membership form, some footer designs and also is part of the cart process for the Store and Product Catalogue.
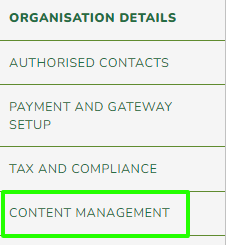
Content Management
This section can vary depending on what modules you have on your site but can include
SEO Tools
For more information on updating and using Search Engine Optimisation Tools on your Member Jungle Site please visit - SEO Tools
Site Map
Google and other search engines use XML site maps to find your website.
If you would like a site map for your Website, click "Generate Site Map". This will generate a /sitemap.xml file, which is used by search engines when indexing your Website.


You will see a Success message to tell your site map is generating. This process may take a while depending on how many pages are on your site and will happen in the background after you leave this area of the website.
Once you have completed your Site details, click Save & CloseSite Settings

- Google Analytics Account ID: Enter your Google Analytics ID here. e.g. UA-121212121-2, this will allow you to track your website using Google Analytics
- Google Maps API Key: Most sites use the default Google API key here or you can use your own (AIzaSyCHBhPmXsx7SscgKHzQ6B6GXVUPbJrgwUA). The Google Maps API is used for the business directory map listing and also for some footer designs that incorporate a map.
- Google Tag Manager API Id: Enter your Google Tag Manager ID here. e.g. GTM-W5ZVBBD, this will allow you to use Google Tag Manager to track your Member Jungle website
- Default Login Page for new Users: If you would like to set a Default page for Users to Login, select this page from the list. This will only work for users added after this setting is turned on.
- Page Approval Process: Select from the drop-down list how you would like your pages activated when using Page Management
- Disable Lazy Loading Images: Lazy loading improves website responsiveness as it only loads images as they are needed. If it causes an issues with displays you can disable it.
Site Pop-Up
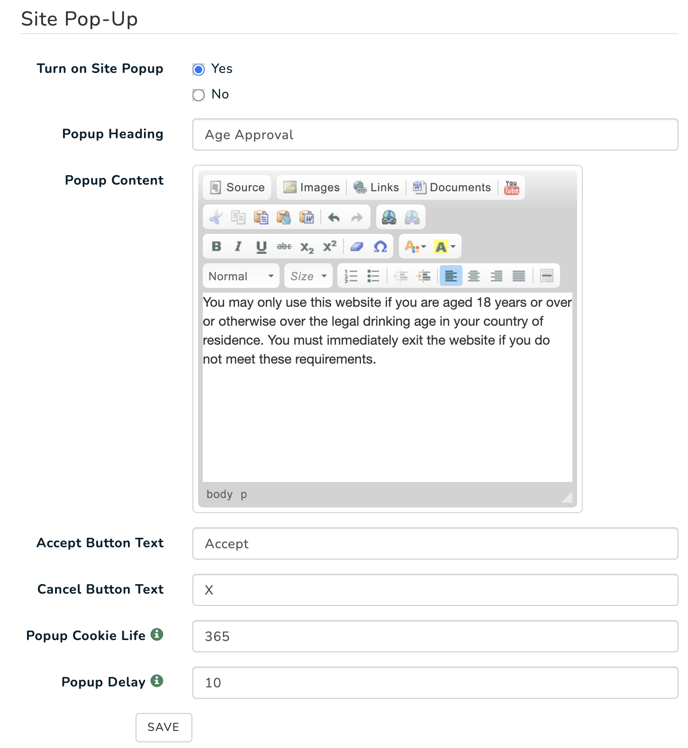
The pop-up modules appears on every page of you site and means visits must accept before they can go past and close the pop-up. i.e. I am over 18 or for GDPR i.e. I accept that Cookies may be used.
If you cannot see this pop-up as an option please contact our support team to have it enabled.

- Turn on Site Popup - Yes or No
- Pop-up Heading - enter the heading text that you wish to appear at the top of the Pop-up box here
- Pop-up Content - enter all of the content into the content area that you wish to show on your pop-up box
- Accept Button Text - what is the wording you wish to have on the button that allows them to close the pop-up and enter your site i.e. - I accept, or I am over 18
- Cancel Button Text - enter the wording here to have on the close button I do not accept, they will not be able to enter the site if they click this option
- Pop-up Cookie Life - Enter the number of days that you wish to have the pop-up acceptance work for i.e. if someone accepts today, do they need to see the pop-up tomorrow, or in 7 days or 365 days time?
- Pop-up Delay - enter the number of milliseconds delay that you would like before the pop-up appears on the site. You can also use other triggers like "MOUSEOUT" or "SCROLL" if you wish to have the pop-up appear when a user scrolls or appears to move their mouse to leave your site.
Using the Site Pop-up for GDPR
You can use the site pop-up to have your website visitors accept that cookies are used on your site, as it appears on every page and they must accept before proceeding further.
Member Jungle websites typically only use Strictly Necessary Cookies, however if you add analytics or any other third party tracking to your site this will change.
If you are using no other tracking - the message could be "We only use Strictly Necessary Cookies on this website . Do you accept"
If you are using any other, your wording will need to ask people to Accept that those cookies may be used.
