
- General Page Management
- Adding a Page
- Adding Widgets to your page
- Using Content blocks for more advanced Page Design
- Re-ordering pages
- Using the Content Editor in Widgets and Pages
- Editing Slideshows
- Using the Document Manager
- Links and Buttons
- How to Build Your Homepage
General Page Management
Page Management has all the tools you need to add, edit, reorder and work on your Website pages.
- To enter the Page Management area, you need to be logged in to the Admin area, and click on Pages in the top menu.
- The Page Management shows a list of all the pages on your website, along with the tools to customise each page.
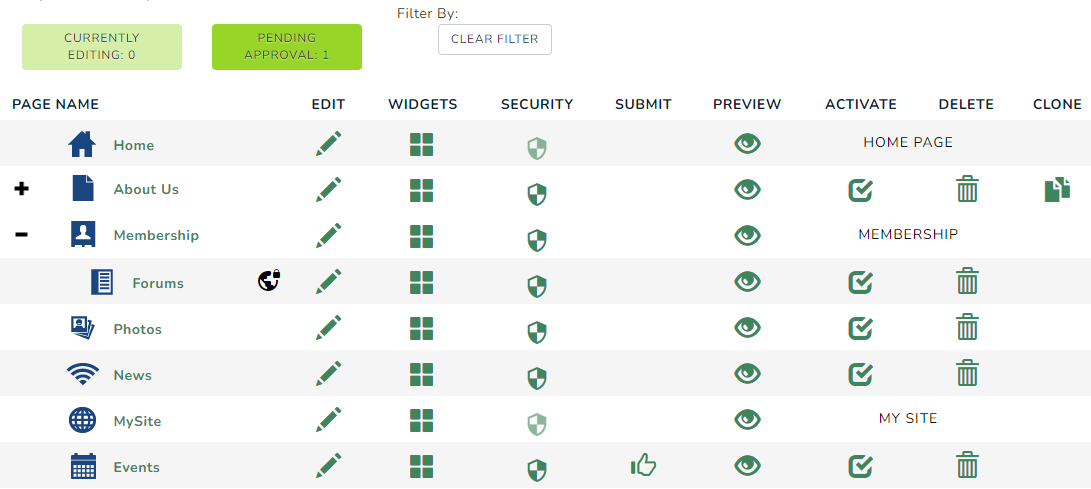
Page Management Tools
- Page Name: This column lists all of the pages on your website.
- The
 symbol indicates that the page has subpages, which can be viewed by clicking the + symbol to expand the list pages.
 - The page names are clickable links, which take you to a preview of each page.
- The blue symbols next to the page names indicate the type of page, or the Modules activated for that page.
- The
- Edit: Clicking on the Edit Icon
 will take you to the Content Editor for that page. Here you can edit and add to the page (see Using the Editor for more information), and customise the SEO Tools for that page. If someone is already editing a page, a locked icon will show
  . This lock will also show if a page it under edit and someone hasn't saved their changes. To continue editing the page, simply click the lock. Just make sure no one else is editing the page before you unlock it.
 - Widgets: The Widgets Icon
 allows you to add various Widgets to your page. See Page Widgets for more information.
 - Security: The Security Icon
-3.jpg?width=26&name=rtaImage%20(21)-3.jpg) will give you the option to create different permissions for each category of Users. See User Roles for more information. The icon
will give you the option to create different permissions for each category of Users. See User Roles for more information. The icon .jpg?width=30&name=rtaImage%20(22).jpg) indicates that the page is role restricted and not accessible by public.
indicates that the page is role restricted and not accessible by public. - Submit: When you have worked on a page Using the Editor, you will need to submit it for approval, by clicking the Submit Icon

- Preview: The preview setting
 allows you to see any edits that you have made to your page that are not yet published (depending on the Page Approval Settings on your site).
 - Activate: Each time you Add a New Page, you will need to activate it by clicking the red toggle switch (inactive)
 which will turn green (active)
  , in order for the page to be live on your Website.
 - Delete: To delete a page, click the Delete Icon
 . It will ask you to confirm that you want to permanently delete this page.
 - Clone: To copy a page, along with all the pages documents, widget and user roles, click the Clone Icon
 . This can then be edited to your requirements Using the Editor.