
- What does the Blog module do?
- Setting up the Blog module
- Accessing the Blog module
- Blog Setup
- Adding Blog Categories
- Blog Users
- Adding a Blog Entry
- Sending Push Notification
- Deactivating a Blog Entry
- Deleting a Blog Entry
- Available Blog Widgets
What does the Blog module do?
The Blog Module allows authorised users to create and maintain a blog. A blog page will be created, once you have completed the Blog set up.
A blog is a series of posts or articles that are displayed in order of date. Blogs are a simple, easy to use way to communicate with your website viewers, and provide timely information and updates. Blogs fuel SEO and will help your website rank higher in search engines.
Setting up the Blog module
To display your Blogs, you will need to have a page on your website selecting "Blog" as the Module Name. The page must also be active. You will be able to tell which page is assigned to the Blog Module by the icon (as shown below). If you would like any text to appear above your Blog items, enter it in the content area with Page Administration.
Refer Adding Pages.
You will also need to setup the following items before adding any Blog Items:
- Blog Setup.
- Blog Categories.
- Blog Users / Authors.


Accessing the Blog module


To access the Blog Module click on the Modules icon in the top navigation and select "Blog" from the dropdown list. You will be taken to the Blog Administration area which shows all of the blog articles currently on your website.

Blog Setup
There are a couple of options you have in the setup of your Blog Module which can be found in the Settings > General Settings tab in the left menu.

- Checking the Comment box next to any of the user status will give that type of user the permission to comment on blogs that are posted.
- Checking the Moderator box next to any of the users will hold any comments made pending until a user with moderator permissions approves the comment. See below section 'Blog Users' for managing blog contributors and moderators.
- Checking the Share Blog box will allow the users to share the blog article to social media and via other other avenues.
- The thumbnail and image max width fields will resize your images when you upload them.
- You also have an option to configure the maximum width of your image and thumbnail.
- For Blog Main Display, you can select how would you like your page display. Currently, you can select either 'Quicklinks' , and 'Standard List'.
Standard List Quicklinks.png?width=205&height=260&name=Blog-and-Updates%20(2).png)
.png?width=454&height=275&name=Blog-and-Updates%20(1).png)
Please note: Blog comments are currently only supported on the website not the app.
Be sure to click SAVE & CLOSE after updating these settings.
Adding Blog Categories
- You must have Blog Categories setup before you can start creating Blogs.
- To add a Blog Category, you must be signed in, and in the Blog Administration area. Click on "Blog Categories" and "Add Blog Category" in the left hand menu.
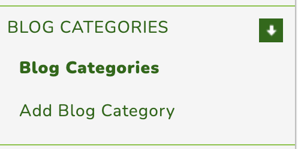
- Enter the name of the category you wish to add. Click "Save & Close".

- You will be taken to the Blog Categories page, which lists all of the current, and new Blog Categories. You will need to activate your new category, by clicking on the red square in the "Activate" column, to turn the square green with a tick.

- Once the category is added and activated, you can add blog articles to this category.
Editing Blog Categories
- You can edit the name of your Blog Categories by clicking on "Blog Categories" in the Blog Administration Area, and clicking the Edit Icon next to the category you wish to edit.

- Once you have changed the name of your Blog Category, click Save & Close.
Blog Users and Blog Author Profiles.
- You can view and control the permissions of all users on the website via the "Blog Users" section in the Blog Administration Area. Only users who have any blog permissions in the Security Module will appear in this area. To read more about controlling access levels see permissions here.
- In this area you can select to make a user a Contributor or a Moderator. This gives the user the ability to login and create articles with their name listed as the author. The user can also add a profile picture, and viewers can see the author and the articles written by that author.
- To make a user a Contributor or a Moderator click on the square in the applicable column to activate or deactivate the permissions as required.

- To give a user a Display name, enter a Biography and add a Profile Picture for the audience to see, click the Edit Profile icon, next to their name, once you have activated their role.
- You can also edit your own profile (which is the only option for certain blog users depending on their permissions) via the left menu. Click "Edit My Profile".

Adding a Blog Entry
- To add a blog entry, you must first have added and activated the Blog Category in which the entry is to be included. (See Adding Blog Categories, above).
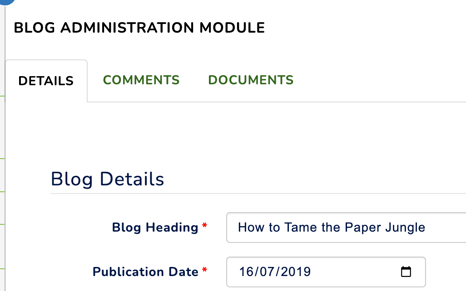
- Click "Add New Blog Entry" from the menu on the left.
- Add the Blog Heading, the publication date which it is to be published, and choose the Author from the drop down list of Contributors.
- Tick the Blog Category which the Blog Entry is to be listed, and type the Blog Article in the content area. (See Using the Editor for further help using the tools in the content area).

Search Engine Optimisation (SEO) Tools in Blogs
At the bottom of the blog content there are some additional fields that will help your blog in search engine optimisation and also affect how it appears in search results.

Please note all of these fields are optional and your blog will still work and automatically use the Blog Heading to generate the Page Title and the Friendly URL. If you are wanting to know more about SEO for your site please read SEO Tools
- Page Title: Page Titles are headings that appear in search engine results and in the name of the tab in your browser window. To read a guide on how to write the best page titles for Google click here.
- Friendly URL: This is a simple way of describing the page to help people navigate directly to this article e.g. if you have an article about the Legal ATO Requirements for Not for Profits in Australia you may use the Friendly URL "atorequirements" this would then generate a Friendly URL so that people can navigate directly too www.yourdomainname.com.au/atorequirements. Friendly URLs can also assist the ratings in search engines. See SEO Tools for more information.
- Page Description: Your page description should be approx. 160 characters long and is the first two paragraphs that appear under your page title in search engine results. They need to be simple, easy to read, and encourage people to click and visit your website. See below example, showing the text entered in the Page Description Field, is the description under the link in search engine results.
- Keywords: You can enter your main keywords here separated by commas. Try and keep them to a minimum with just the ones that relate to this particular blog article.
Managing Images and Documents in Blogs
- You can include pictures to your blog once the blog article has been saved. You can do this via the Manage Documents area or if you click Save in the blog, the Images icon will appear in the editor.

- Alternatively you click on the Save and Manage Documents which will taken to a page where you can upload your images. Once the images are uploaded, you can return to the Details tab, where you can add your images to the Blog Entry by selecting the Images Icon in the Content Editor.

- You can choose a main image for your Blog Entry, by selecting the star icon next to the relevant image, in the Documents tab.
- This image will appear on the Blog Overview Page, next to a small sample of the text in the article.

- The first text in the article appears on the Blog Overview page, to give the reader a sample of its content. For this reason, it is not recommended that a picture is included within the first lines of the Blog Entry.
- To add Documents and Images to your Blog Entry, you need to select Save & Manage Documents at the bottom of the editor page, and upload the document in to the Documents tab. Once the Document is uploaded, you can return to the Details tab, and select the Documents Icon in the editor to include the selected document in to your Blog Entry. (See Using the Editor for further help using the tools in the content area).

Editing a Blog Entry
- To Edit an existing Blog Entry, select Blog Entries from the left menu, to view a list of all the Entries.
- Click the Edit icon beside the Blog Entry that requires editing (see below image). This will take you to the Blog Entry page, where you can make the changes you require.
- When you have completed your edit, click Save & Exit.
Activating a Blog Entry
- Once you have completed your Blog Entry, you must activate it for it to be viewed on your website. To do this, click the Save & Close button on the bottom of the editor page. This will take you to a list of all the Blog Entries.
- Click on the Activate button next to the new article. A green button means that the Blog Entry is activated, a red button means that it is inactive.
- You can also access the required page to activate your Blog Entry at a later date, by selecting Blog Entries from the left menu bar, and completing the same steps as above.

Sending a Push Notification
Once you have completed a blog, and activated it, you can send a push notification through to the mobile app to alert your members of the new blog article. To do this, click on the Notify App icon 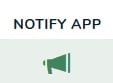 next to the blog you wish to share.
Deactivating a Blog Entry
- If at any time you need to deactivate an Entry, select Blog Entries from the left menu bar.
- Click the green button in the Activate column, beside the Blog Entry you wish to deactivate. It will turn red when deactivated. (See above image).
Deleting a Blog Entry
- To delete a Blog Entry, select Blog Entries from the left menu bar.
- Click the Delete icon next to the Blog Entry you want to delete. (See image above) A Warning message will pop up to check you want to permanently delete the selected Entry. Click OK, and your Blog Entry will be deleted.
Available Blog Widgets
Side Column Widgets
- Blog Categories
.png?width=278&height=113&name=About-the-Club%20(2).png)
- Blog Search
.png?width=244&height=125&name=About-the-Club%20(3).png)
- Blog Search Sorted by Relevance
.png?width=246&height=57&name=About-the-Club%20(7).png)
- Blog Latest
.png?width=216&height=174&name=About-the-Club%20(8).png)
Centre Widgets
- Blog Quicklinks
.png?width=424&height=273&name=About-the-Club%20(9).png)
- Blog with Output and Blog with Thumbnails
.png?width=402&height=518&name=About-the-Club%20(6).png)