
How to set up and sell tickets, collect additional information per attendee, give member discounts, and access Ticket Reports for events using the Events Module.
Overview
- To take online payments for events you will need to create an event as shown in the Add or edit an event using the Events Module article, and under the Registration tab "Allow Online Registration" marked as Yes.
- Ensure to set up your payment settings before creating a ticketed event.
- Have the right administration access i.e. there are 3 levels of the events module which control your access so if you still can't see the ticketing tab, please contact our support team.

This article goes through everything you need to know about event ticketing including:
- Adding a ticket
- Giving users Discounts
- Restricting Tickets Access
- Adding Ticket Fields
- Selling Additional Products
- Adding a Refund Policy
- Managing Manual Payments for Events
- Watch Video Tutorial
Add Ticket
Under the Ticketing tab, this is the page that should appear on your screen.
To add a ticket click "ADD TICKET".
- Ticket Name - name given to the ticket
- Description - that will be visible to your website visitors
- Default Price- Enter the price that each ticket will sell for. Remember any additional transaction or service fees will be added on top of this price (unless you have the option set to absorb Member Jungle fees)
Discounts
You can grant either a decimal percentage discount or a specific amount on tickets to any role or group within the security system (including your Membership Levels) or by using tags for this purpose.

- Role/Tag: Select the role you wish to apply the discount to from the Role drop down box and
-
Enter either the percentage discount or the fixed amount discount that they will receive.
- THEN click on the Add button to add this discount.
- You can continue adding multiple discounts to different roles.
- To delete a discount click on the bin icon to the right of the discount you wish to delete.
Restrict Ticket to Roles/Member Tags
To restrict the public from purchasing tickets for your event, you can set the event to allow ticket purchases only for individuals with the appropriate role or tag.

You can use this feature to make your event details publicly accessible while restricting ticket purchases to members or specific roles. To do this, set your event to 'Public' under the Security tab, ensuring that only 'Event Tickets' remain restricted. Public tickets / no role will still be available for anyone to purchase.
Order Limits
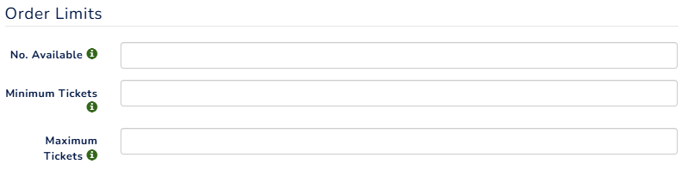
- No. Available: You can choose the number of tickets that are available which will decrement as they sell and will stop selling once they are all gone.
Note: If people add a ticket to their purchase and don't complete the transaction it will be held for 15 minutes before it will be made available again for sale.
- Min Ticket: You can set a minimum amount that can be sold to a member or just leave it at 0 (if it is a product or non-compulsory item)
- Max Ticket: You can set a maximum amount that can be sold to a member per transaction.
Ticket Fields

Ticket fields are additional custom attributes you can add and will require the user to complete the details for each ticket purchased. This is where you can also add "Account Type Fields" to collect the names of the people attending to help with attendance management. You can enter a maximum of 10 ticket Fields and choose if they are a required field or not. You can also create a custom event form, which is completed once per purchase in addition to these fields - read more.

- Field Name - Enter the label or field name you would like
- Type - Choose from Text, Dropdown, Radio Button, or Checkbox
- Account: The account field will collect first name, last name and email address for every ticket purchased. It will also require purchasers to nominate;
- If the ticket is for them
- If the ticket is for any of their secondary members
- Name all other attendees
- Text: Ability to enter free text.
- Dropdown Selection: Create dropdown list for user to select.
- Radio Button: Select a single option.
- Checkbox: Ability to select multiple options.
- Account: The account field will collect first name, last name and email address for every ticket purchased. It will also require purchasers to nominate;
- Required - Tick this option to if needed.
- For radio buttons, checkbox and dropdown fields, you will need to enter the option names for that field, click on the + to continue to add more options.
- Make sure you click "Add" to the right of each field attribute.
- Once you have finished adding ticket fields click “Add” at the bottom of the pop-up screen to complete the ticket creation
- The ticket type will then appear on your screen as inactive, click the red button to activate your new ticket.
 Note: if the event is also active and registrations are open the tickets will be available on your website instantly. Once your ticket is active it will be displayed with a green "Active Button"
- Continue adding tickets until you are finished,
Selling Additional Products
- You can also offer customers additional products to purchase in the same transaction as their tickets. The products which will be available to purchase on the next screen after a website visitor has chosen their tickets.
- Adding products is the same process as for adding tickets.

Refund Policy
If you are selling tickets to an event, it is mandatory that you select your refund policy.
You have the option of allowing refunds up to 1, 7 or 30 days prior to the event start date, or you can opt to not give refunds at all.
Please note that this selection cannot be changed once a member has purchased a ticket to your event.-4.jpg?width=688&name=rtaImage%20(11)-4.jpg)
You can create custom registration forms for your event in the Forms tab. See Creating custom ticketed event forms for further information.
You must click "Save and Close" or "Save" at the bottom of the screen for any ticketing changes to be saved.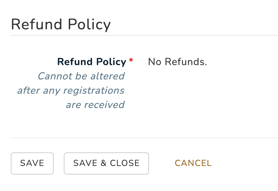
Managing Manual Payments
To view event ticket payments go to the events dashboard and click the tickets icon for the event you would like to view payments for. ![]()
You will now see a list of payments.
![]()
Payments held pending are displayed with a red hourglass.
To confirm a pending payment, click the payment amount. This will display a popup window with the payment details.

If you're happy the payment has been made, click CONFIRM PAYMENT to process the payment. You will get a confirmation the payment has been processed.
