
Please note: The Online Store module is only available on the Standard plan and up. On lower plans the Online store module is available for selling additional products during membership signup or renewal. To upgrade your plan, please contact us.
This Article Covers the Following Sections
- Creating an Online Store Page
- Accessing the Online Store Module
- Add Product to the Online Store
- Activate/Deactivate Products
- Managing Product Availability
- Linking Products To Specific Membership Levels
- Featured Products
- Categories - Role/Tag Restricted Categories
- View Orders
- View Reports
- Settings
- How to Create a Custom Product When Purchasing an item via the website?
- How to purchase items for members/non-members as an admin?
Creating an Online Store Page
This is only required for customers on the Standard package or higher who wish to sell products on a dedicated page.
To get started, add a new page and set the Module Name to Online Store.

Click Save & Close.
Next, activate the page by clicking the red square  to turn it green.
Accessing the Online Store Module
Once logged in as a Site Administrator go to the MODULES list and select Online Store.
You will then be met with the Online Store overview dashboard.-Oct-13-2020-12-45-20-98-AM.jpg?width=670&name=rtaImage%20(1)-Oct-13-2020-12-45-20-98-AM.jpg)
online store is configurable by adding widgets on the overview dashboard. Click  , there are that are available the 'Sales Trends' and 'Top Customers'.
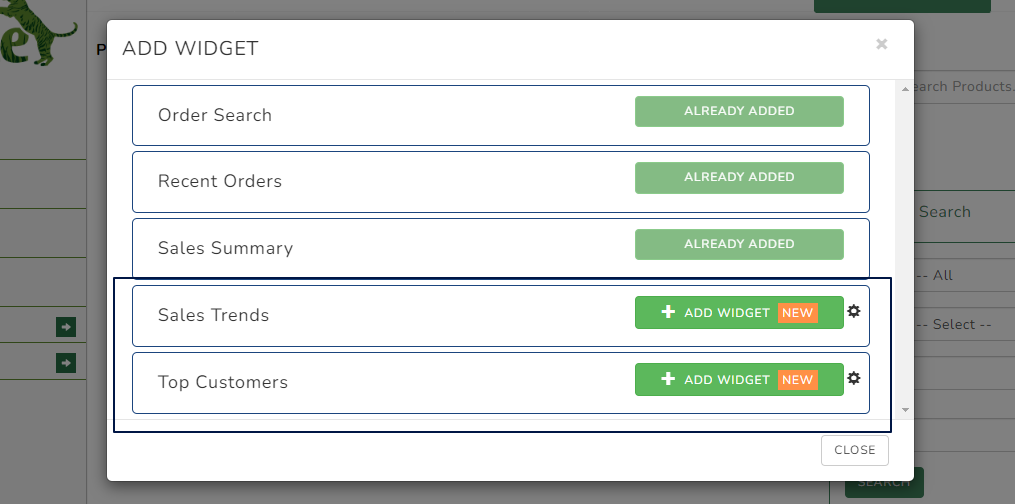
This is what 'Sales Trends' looks like. 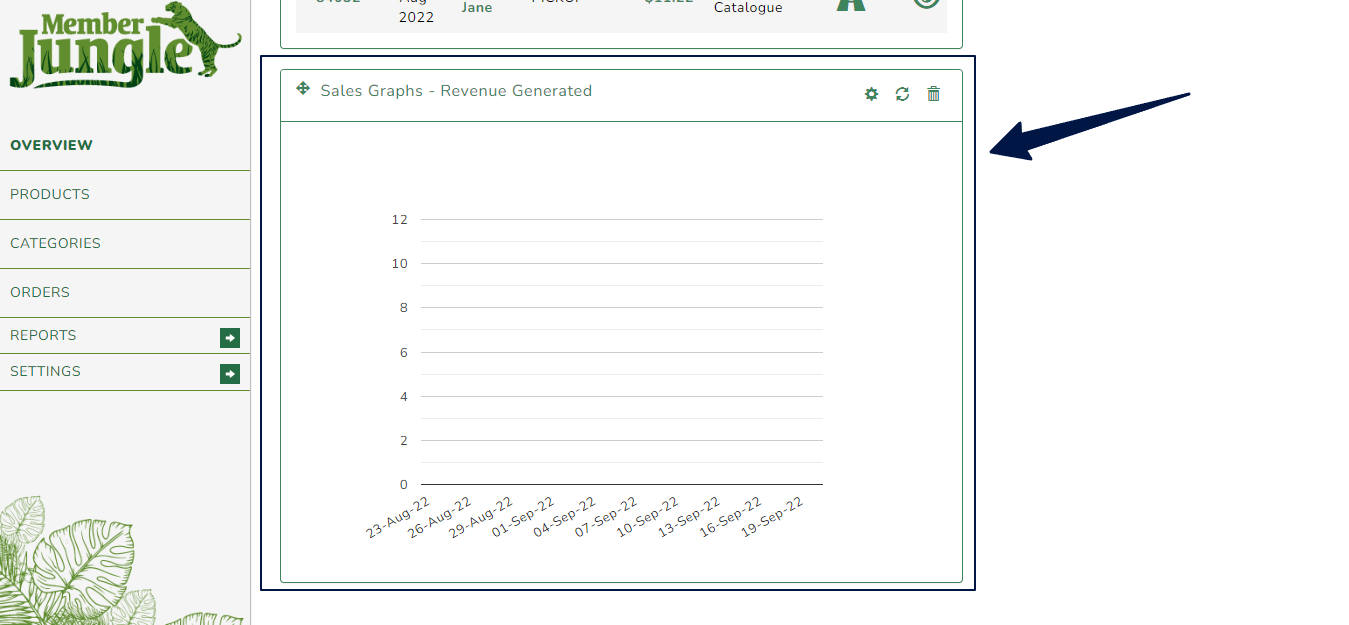
The 'Top Customer' widgets will give you a data of who are the top buyers for a certain period of time.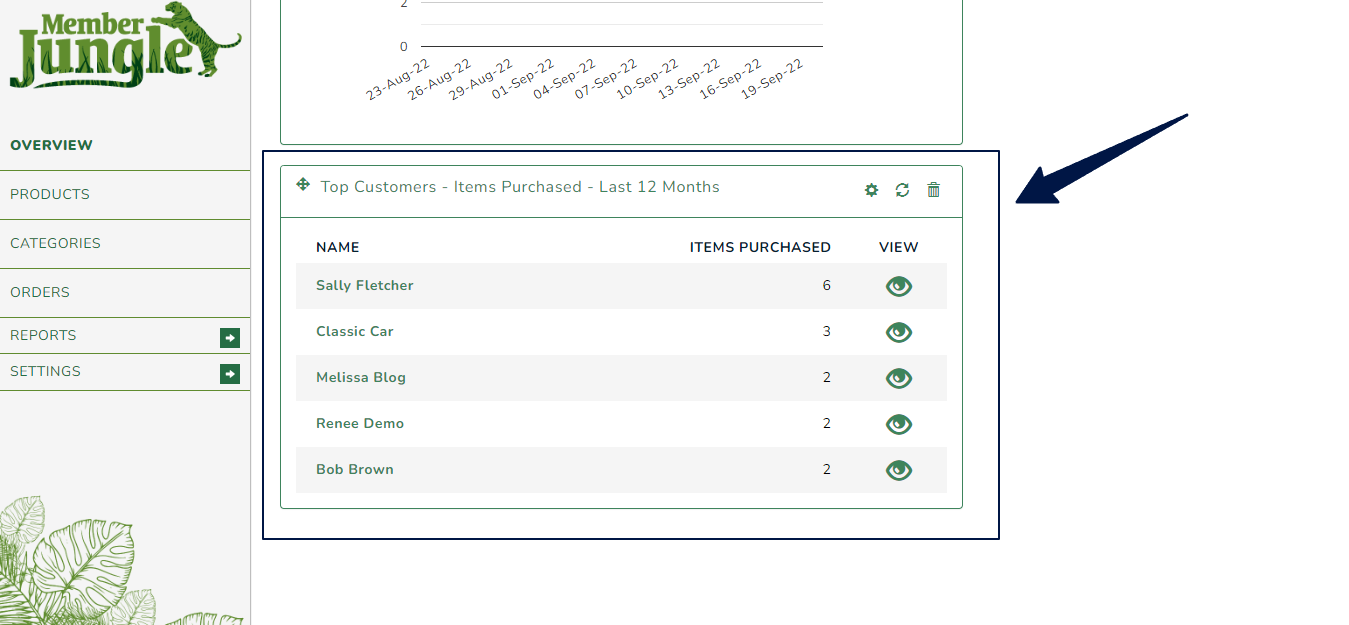
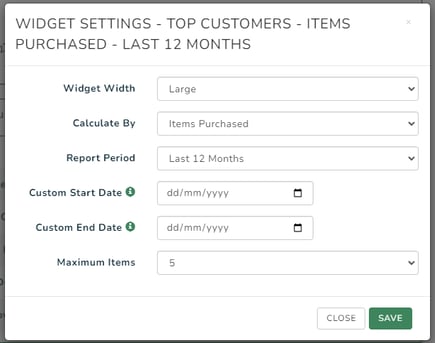
You can configure the data by clicking the gear icon  .
.
Add Product to Online Store
To get started adding a product, go to PRODUCTS in the left navigation.-Oct-13-2020-12-46-23-05-AM.jpg?width=249&name=rtaImage%20(2)-Oct-13-2020-12-46-23-05-AM.jpg)
Click ADD PRODUCT.-Oct-13-2020-12-46-53-77-AM.jpg?width=670&name=rtaImage%20(3)-Oct-13-2020-12-46-53-77-AM.jpg)
In the pop-up window enter the product details, price, and delivery options. Size, colour, and free text options can also be added but are not required.
Important: For the Main Product Image it is best to use an image that is 1:1 ratio at least 400x400px and no larger than 10MB. If your image doesn't match these dimensions you will likely need to use image editing software and adjust the image canvas size to suit. This will ensure all images are displayed correctly.-Oct-13-2020-12-47-09-36-AM.jpg?width=670&name=rtaImage%20(4)-Oct-13-2020-12-47-09-36-AM.jpg)
Next, you need to set the Special Tax Rate, Delivery Methods, and Custom Deliver Price. The Special Tax Rate and Custom Delivery Price are optional configuration settings.
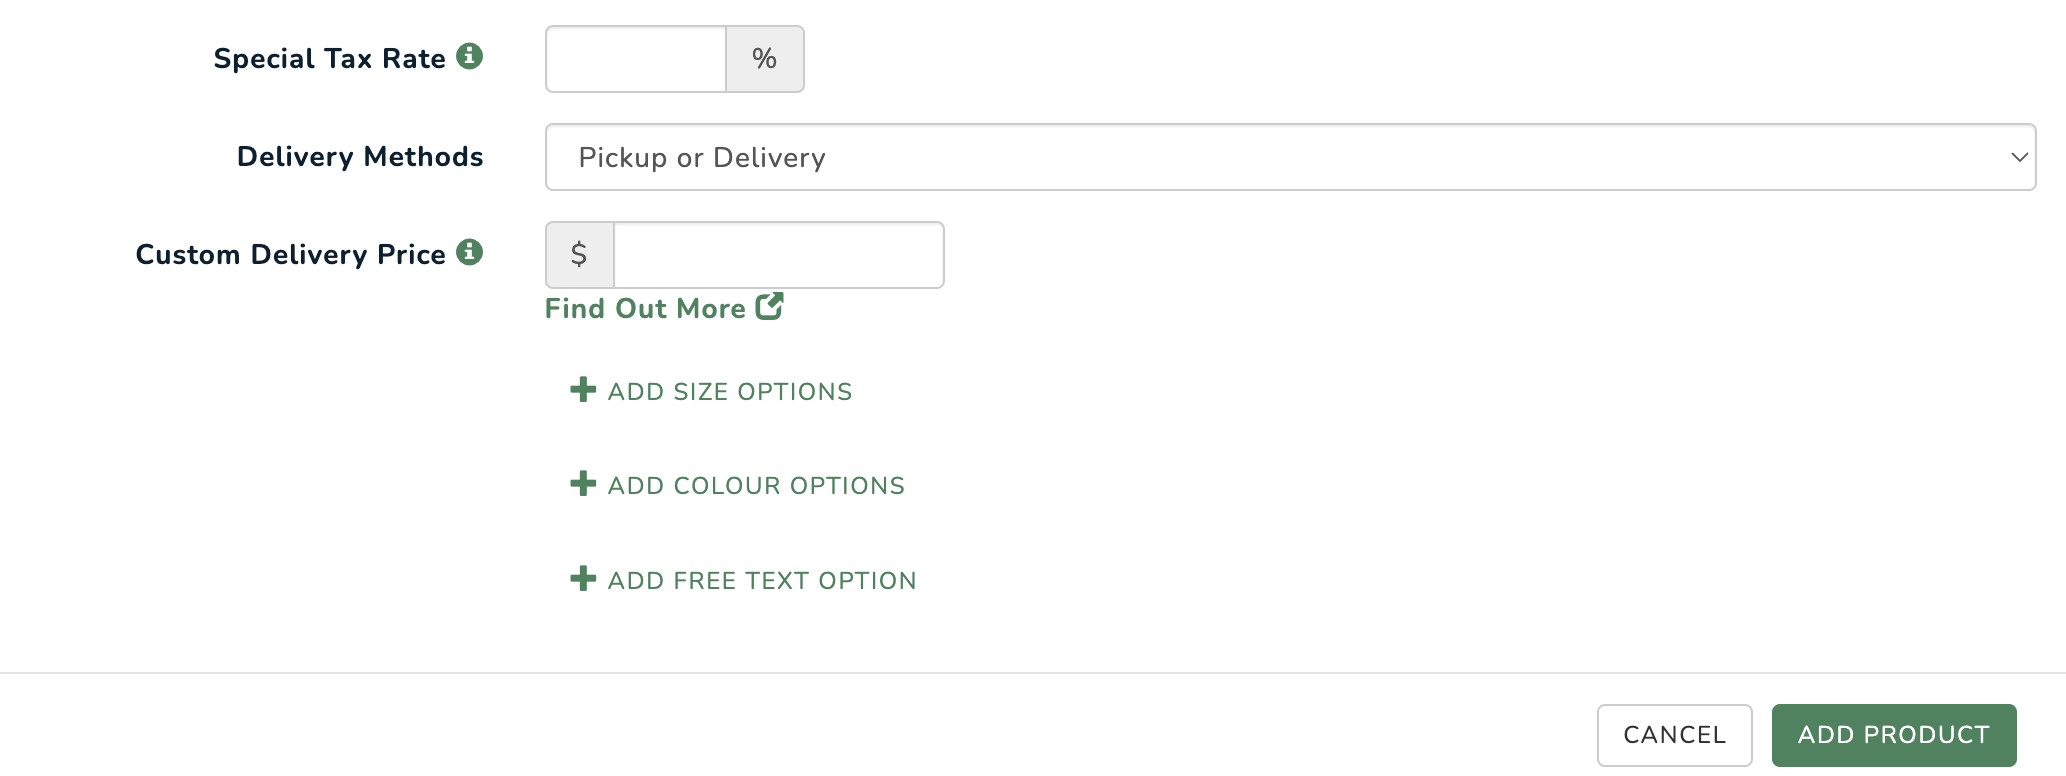
Special Tax Rate: Enter your tax rate in this field if it is different to the default tax rate.
Delivery Methods: Choose from the available options in the dropdown list.
Custom Delivery Price: This option applies independently of the default shipping rates set in Delivery Rates (details below). The custom delivery price is applied to this product only. Default shipping costs may also apply if additional non-custom delivery products are added to the cart as part of a larger purchase.
Items with a custom delivery price will appear with a truck icon in the list as shown below.
![]()
Add Size Options
To add size options click the -Oct-13-2020-12-49-02-56-AM.png?width=152&name=rtaImage%20(2)-Oct-13-2020-12-49-02-56-AM.png) button and enter each size in the field. Click the plus button to save each size.
button and enter each size in the field. Click the plus button to save each size.-Oct-13-2020-12-49-18-06-AM.png?width=365&name=rtaImage%20(3)-Oct-13-2020-12-49-18-06-AM.png)
Size options can be reordered using the ![]() buttons and enabled or disabled by ticking or unticking the checkbox
buttons and enabled or disabled by ticking or unticking the checkbox ![]() . To delete a size option click the trash button
. To delete a size option click the trash button ![]() .
.
Add Colour Options
To add colour options click -Oct-13-2020-12-50-22-08-AM.png?width=186&name=rtaImage%20(7)-Oct-13-2020-12-50-22-08-AM.png) .
.
Managing colour options is exactly the same as managing size options so please see the above documentation for details.-Oct-13-2020-12-50-37-47-AM.png?width=670&name=rtaImage%20(8)-Oct-13-2020-12-50-37-47-AM.png)
Add Free Text Label
Free text label can be any text you wish to ask, e.g. if you're selling name patches you could ask "Enter name for patch", and make the field required. The user will then be required to supply the information during purchase.-Oct-13-2020-12-50-53-34-AM.jpg?width=670&name=rtaImage%20(5)-Oct-13-2020-12-50-53-34-AM.jpg)
When all options are done, click SAVE.
Activate/Deactivate Products
To activate a product click -Oct-13-2020-12-51-19-20-AM.png?width=81&name=rtaImage%20(9)-Oct-13-2020-12-51-19-20-AM.png)
To deactivate a product click -4.png?width=80&name=rtaImage%20(10)-4.png)
Managing Online Store Product Availability
By default, products are available in the online store. Products can also be made available in other modules. Here's a few examples of what the product availability icons mean:-Oct-13-2020-12-51-45-98-AM.jpg?width=670&name=rtaImage%20(6)-Oct-13-2020-12-51-45-98-AM.jpg)
- Awesome product: isn't available in the online store or any other modules. You can tell this by both availability icons being greyed out.
- Even more awesome product: is only available in the online store page not any other modules. You can tell this by the solid green ticket icon and greyed out modules icon.
- Test widget: isn't available in the online store but is available in other modules. You can tell this by the greyed out ticket icon and solid green modules icon.
You can make a product available to both the online store and any other listed modules as required.
Select the module you would like to add the product to from the list then click -4.png?width=132&name=rtaImage%20(11)-4.png)
-2.png?width=331&name=rtaImage%20(12)-2.png)
Now that the product is added to the module you can active it by clicking activate ![]() . This will make the product available module-wide. To make the product available to a specific area within the module see the following sections.
. This will make the product available module-wide. To make the product available to a specific area within the module see the following sections.
You can also edit the product details, view orders or delete the product from the module (product will still be available in online store Module).-2.png?width=670&name=rtaImage%20(14)-2.png)
Linking Products To Specific Membership Levels
When a product is linked to the membership module and activated it is available across all membership levels. You also have the option to leave a linked product available module-wide or only make it available to specific membership levels.
The following steps apply to managing membership levels. For more details about managing membership levels please see Membership Level Setup.
From the Membership Level admin you will see Membership Wide Additional Products. These are the products linked to membership available module-wide.-Oct-13-2020-12-53-03-79-AM.jpg?width=670&name=rtaImage%20(7)-Oct-13-2020-12-53-03-79-AM.jpg)
To link a product to a specific membership level, view the products for that level.-2.png?width=670&name=rtaImage%20(15)-2.png)
You will then see the option to link additional products. Click LINK PRODUCT.-2.png?width=469&name=rtaImage%20(16)-2.png)
Select from the available products and click LINK ![]()
-1.png?width=670&name=rtaImage%20(18)-1.png)
Once a product is linked to a membership level you will need to activate it to make it available.-1.png?width=670&name=rtaImage%20(19)-1.png)
Once activated the product will be available to purchase via that specific membership level.
Auto Adding Products to a Membership Linked Sale
Often there are situations where members have to also pay a something with their membership i.e. a posted magazine, a state or national membership fee. You can include products that are linked to membership to be
- Automatically Added to the cart (but able to be removed)
- Required in the Cart (with no ability to be removed)
To do this, once you have linked a membership product as shown above, click on the Edit button
Tick the relevant option and click save and make sure the link product is activated. The product will then be added to the cart when the member purchases a product from the particular membership level.

You will be able to see icons displayed beside the products which are required or auto added to the cart (as shown above).
Featured Products
Featured products are shown in additional display widgets that can be placed on any page. See widgets for more information on managing page widgets.
To make a product featured, select the star icon for that product. Click the star icon for all products you wish to be shown in a featured product display widget.-Oct-13-2020-12-54-25-90-AM.jpg?width=81&name=rtaImage%20(8)-Oct-13-2020-12-54-25-90-AM.jpg)
A solid green star mean the product is featured. The hollow star means the product is not featured.
Categories
To view existing categories or create new categories, click CATEGORIES in the left navigation.-Oct-13-2020-12-54-39-69-AM.jpg?width=251&name=rtaImage%20(9)-Oct-13-2020-12-54-39-69-AM.jpg)
You will see existing categories listed with the option to create new categories via ADD CATEGORY.-Oct-13-2020-12-54-52-38-AM.jpg?width=670&name=rtaImage%20(10)-Oct-13-2020-12-54-52-38-AM.jpg)
Click ADD CATEGORY to add a new category.
Role/Restricted Categories
If you wish to restrict a category of products to just a particular membership level or tagged group of members, under the category. Enter the category name, select allowed roles/member tags if you wish to restrict this category to particular roles or members, and then click "Add Category" to save.
The new category is inactive by default. To activate the category, toggle the "ACTIVATE" button until it turns green. Red indicates the category is inactive.
View Orders
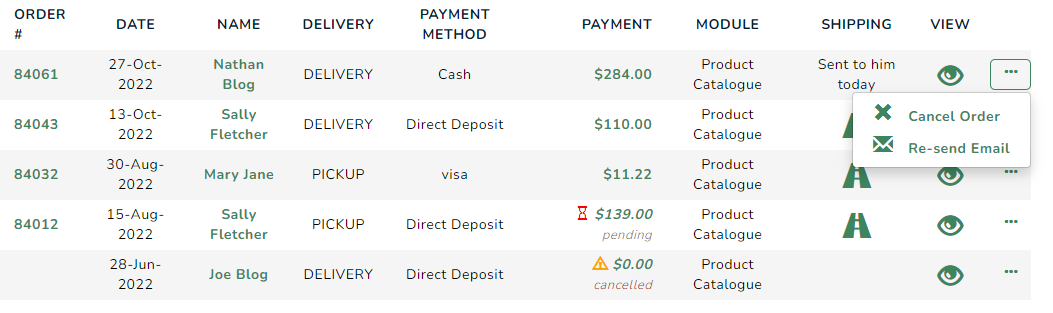
Clicking ORDERS in the left navigation or the orders button ![]() in the membership products page will take you to the ORDERS admin.
in the membership products page will take you to the ORDERS admin.-Oct-13-2020-12-55-36-72-AM.jpg?width=249&name=rtaImage%20(12)-Oct-13-2020-12-55-36-72-AM.jpg)
Use the report filters to search for a specific module, product, status, and or a customer. You can also export the results to a CSV.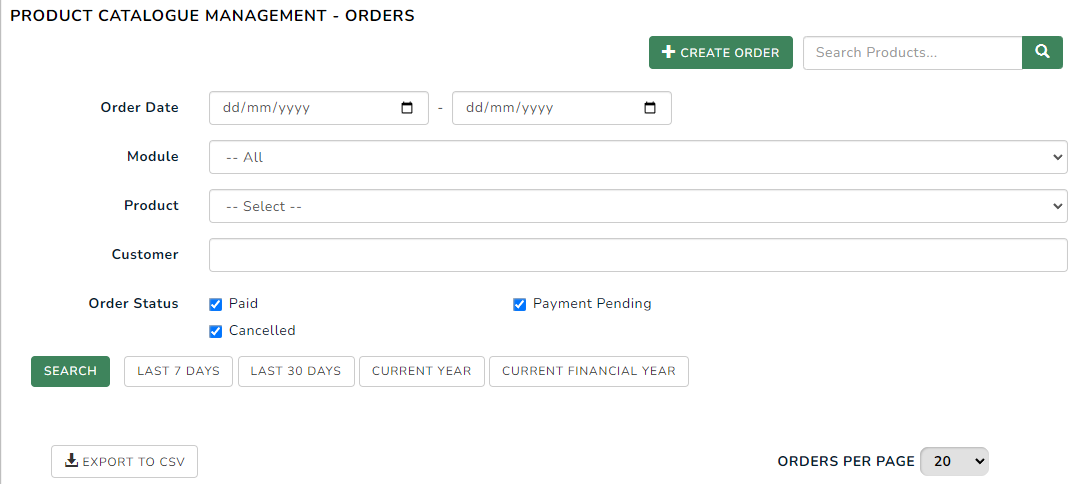
The list of orders can be viewed under the orders report filters. Here you can VIEW an order invoice by clicking on the order number or the VIEW button.
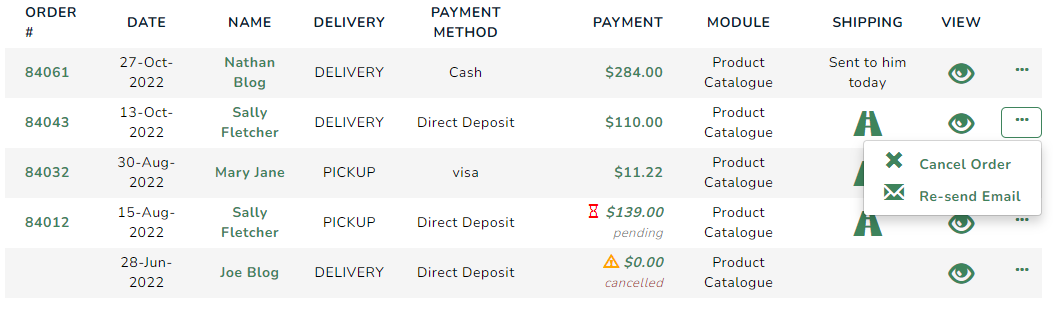
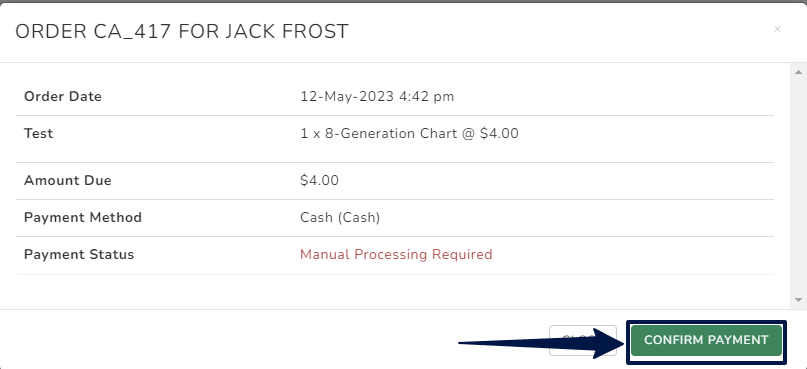
When cash and deposit manual payment options are enabled, members who utilised these payment methods for their orders will be highlighted as "pending" under the payment column and will see a red hourglass indicator. ![]() .
.
To confirm the payment just click the amount and hit 'confirm payment'
To add a shipping tracking code click SHIPPING and enter the code.
-Oct-13-2020-12-56-08-16-AM.jpg?width=670&name=rtaImage%20(13)-Oct-13-2020-12-56-08-16-AM.jpg)
To view an invoice click on the ORDER No. While viewing and invoice a PDF copy can be downloaded by clicking -1.png?width=178&name=rtaImage%20(22)-1.png)
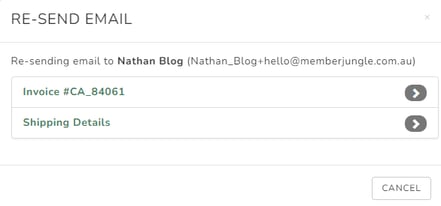
Resend Emails
You have the option to resend the invoice for non-cancelled orders and the tracking details for shipped orders.
View Reports
Reports can be viewed by clicking REPORTS in the left navigation and selecting the report you wish to view.-Oct-13-2020-12-56-31-72-AM.jpg?width=248&name=rtaImage%20(14)-Oct-13-2020-12-56-31-72-AM.jpg)
Product Report
The product report lists summaries of products sold. Reports can be filtered by order dates and or individual products..png?width=670&name=rtaImage%20(23).png)
To view individual orders for the product click VIEW ORDERS. To view product options click OPTIONS.-1.png?width=302&name=rtaImage%20(24)-1.png)
Stock Report
The stock report gives you a list of remaining stock on hand if you choose to maintain stock levels.-Oct-13-2020-12-57-10-50-AM.jpg?width=670&name=rtaImage%20(15)-Oct-13-2020-12-57-10-50-AM.jpg)
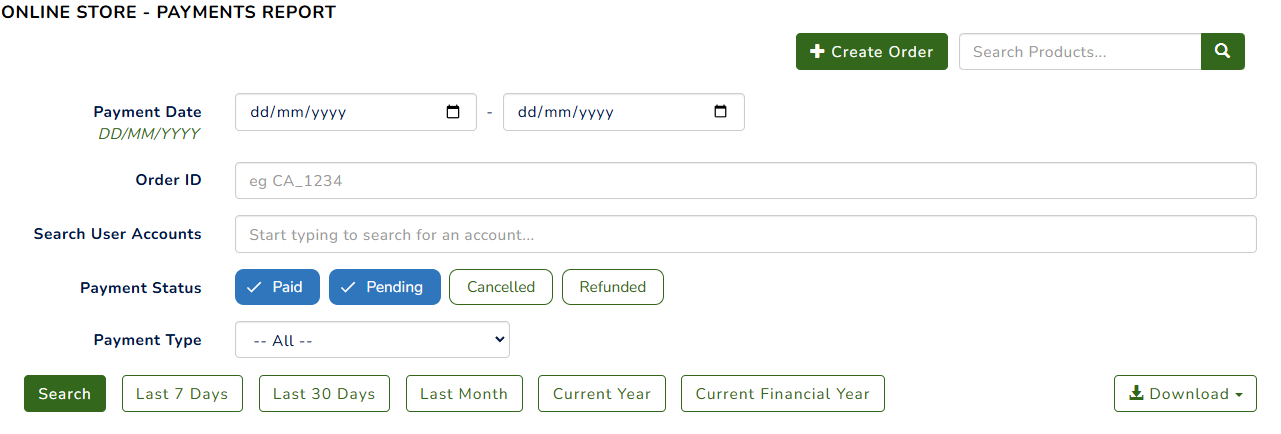
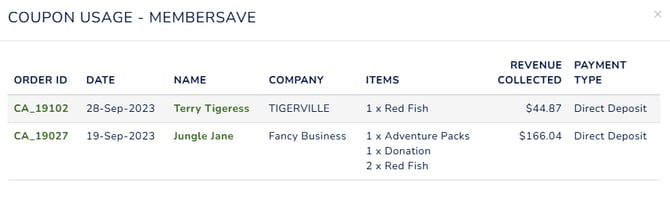
Payments Report
The Payments Report provides a breakdown of purchased items and the revenue collected for each transaction. For more details, please see here: Online Store Payments Report
Settings
To view the module settings click SETTINGS in the left navigation.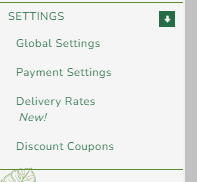
Global Settings
Here you can add an email address to receive order notifications, enable international delivery, and add an invoice note to be shown on invoices.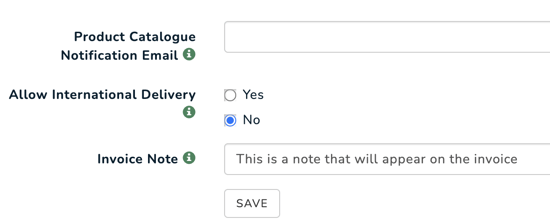
Payment Settings
This section is used to configure your available payment methods. Credit card is generally enabled by default, however, other manual payment methods like cash and direct deposit can be enabled.
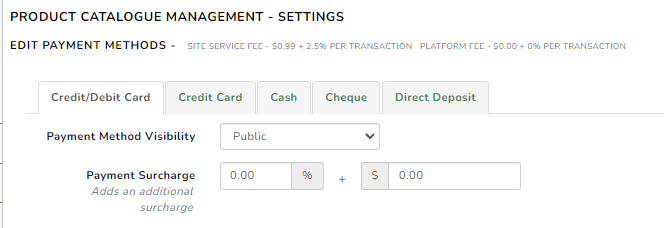
Members who used manual payment methods for their orders, such as cash and direct deposit, will be marked with a "pending payment" status on the "Order Dashboard" until admins mark them as paid.

For more details on how to configure this feature, please visit Payment Settings
Delivery Rates
Delivery rates are how you can enable default shipping rates for varied price ranges.

In this example, if a total order is between $0-$50 the shipping rate applied will be $25. For $51 to $100 the shipping rate will be $15.
To add a new shipping rate, click + ADD DELIVERY PRICE ![]()
Enter your desired price range (i.e. all orders between X and Y will be charged Z Delivery Price) and click ADD DELIVERY PRICE
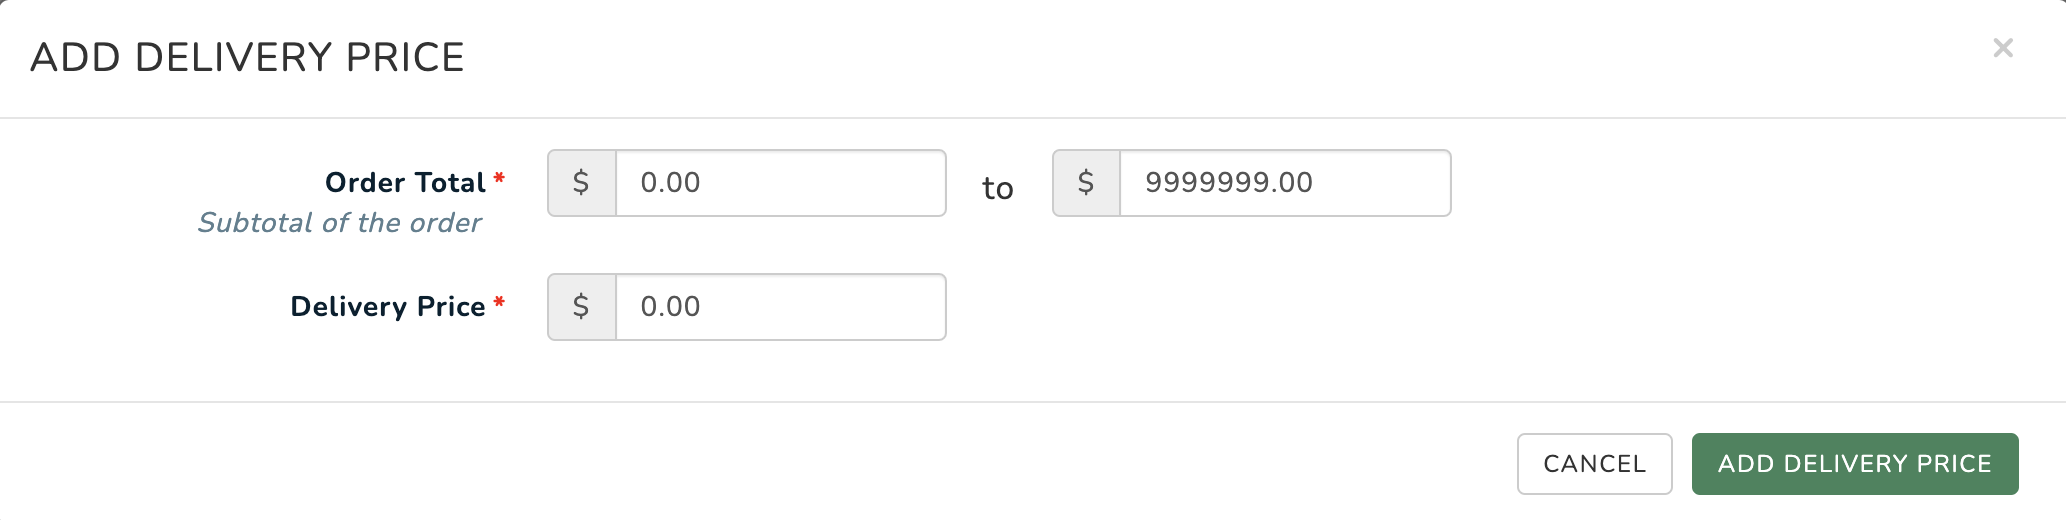
Your new delivery price range will now be visible.
You can edit or delete any existing delivery rate by clicking edit or delete respectively.
Please note: there is also a custom delivery price that can be added per product which will be added to any delivery price order total. See Adding Products
Discount Coupons
This area displays any existing discount coupons. These coupons can be used by customers to receive a percentage discount or dollar value discount on a purchase.
To create a discount coupon, click -4.jpg?width=190&name=rtaImage%20(18)-4.jpg) .
.-4.jpg?width=670&name=rtaImage%20(19)-4.jpg)
- Coupon Code – The name or identifier for the discount.
- Notes – Additional details or remarks about the discount code, if needed.
- Start Date – The date when the discount code becomes active. If left empty, the discount coupon will be usable immediately after it is activated.
- End Date – The date the discount code will no longer work. If left empty, the coupon will remain usable indefinitely until an expiry date is set or it is manually deactivated.
Click ADD COUPON to save.
The coupon code is inactive by default. You need to manually activate the discount coupon.
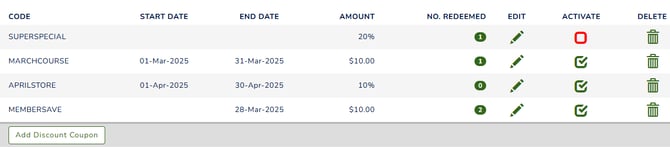
You can view how many times each discount code has been redeemed by clicking the number icon in the 'Redeemed' column.
Below are the other icons you may see and their corresponding functions:
![]() Editing a Coupon Code – You can update an existing coupon, such as extending its end date or modifying other details.
Editing a Coupon Code – You can update an existing coupon, such as extending its end date or modifying other details.
![]() Inactive Status of a Coupon – Indicates that the discount code is currently disabled and cannot be used.
Inactive Status of a Coupon – Indicates that the discount code is currently disabled and cannot be used.
![]() Active Status of a Coupon – Indicates that the discount code is enabled and available for use.
Active Status of a Coupon – Indicates that the discount code is enabled and available for use.
![]() Deleting a Discount Coupon – Permanently removes the coupon from the system. This action cannot be undone.
Deleting a Discount Coupon – Permanently removes the coupon from the system. This action cannot be undone.
How to Create a Custom Product when Purchasing an item via the website?
As an administrator with the necessary permissions, you now can add a 'custom product' seamlessly through the website.
Navigate to online store > Create Order.
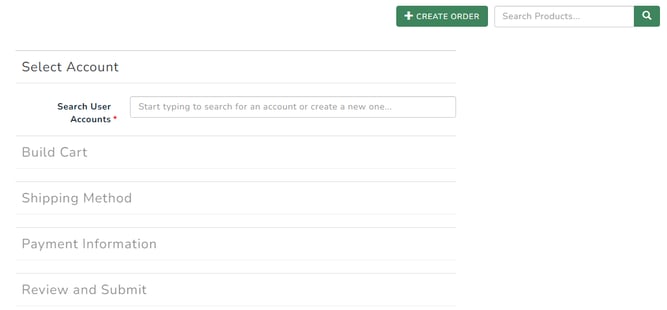
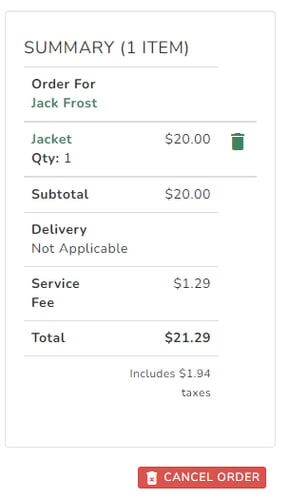
Step 1. Select Account: Look for the user using the search field.
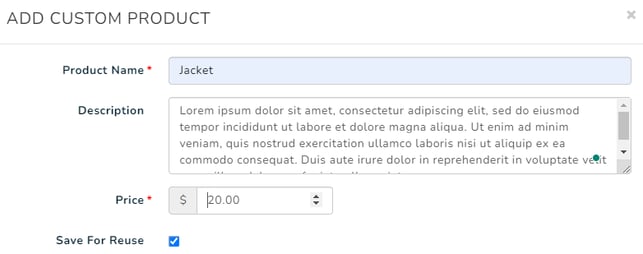
Step 2. Build Cart: Click on the ' + Add Custom Product' button, where you can input the product name, description (if necessary), price, and choose to save it for reuse by ticking the 'Save for Reuse' option.
A summary of orders for users should be visible on the right side of your screen. To include additional existing products, simply click the 'add to cart' icon. If you wish to add another 'custom product,' follow the same process again. Once done, click 'continue to shipping'.
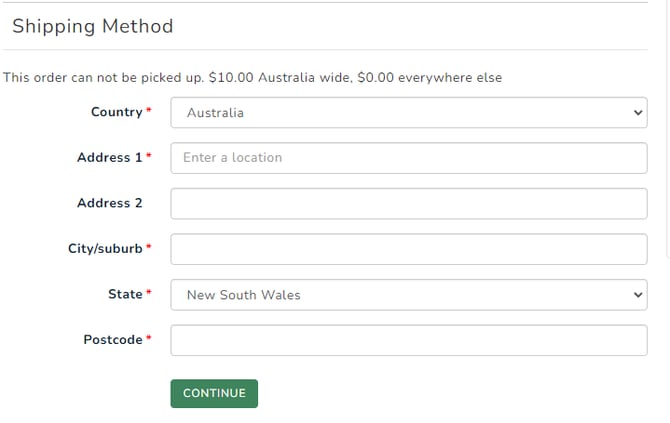
Step 3. Shipping Method: When creating custom products, the default shipping method is set to pick-up, with no other options available. If you wish to add a shipping method for the custom product you've created, simply edit the product to make the necessary adjustments.
To do this, go to Categories > Custom Products > hit the product icon > look for the custom product you created and hit the pen icon to edit. Under the 'delivery method' dropdown option, select the desired shipping method. Afterwards, click on the "Save" button to confirm your changes.
Note: If you did not select the 'Save for Reuse' option, the custom product will not appear under the Custom Products categories. In addition, there's no shipping/delivery fee for custom products.

You can enhance the details of the 'custom product' by incorporating additional information such as available colours, sizes, etc., if necessary.
If you decide to edit the custom product, it's necessary to cancel the previous order and redo the process before proceeding to the payment stage. This time, you don't need to create another custom product, you only need to use the search field to look for the custom product you edited.
If not, you can move on to the next steps.
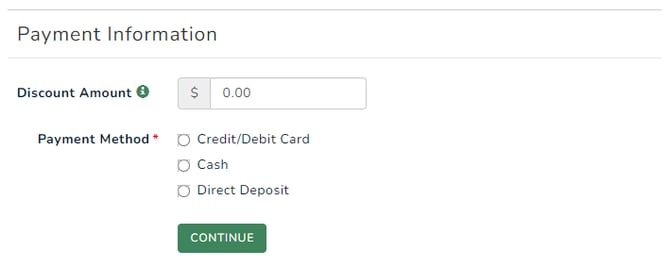
Step 4. Payment Information: Select the desired payment method.
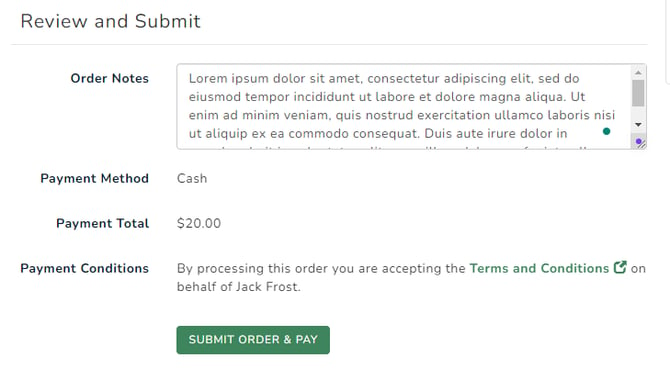
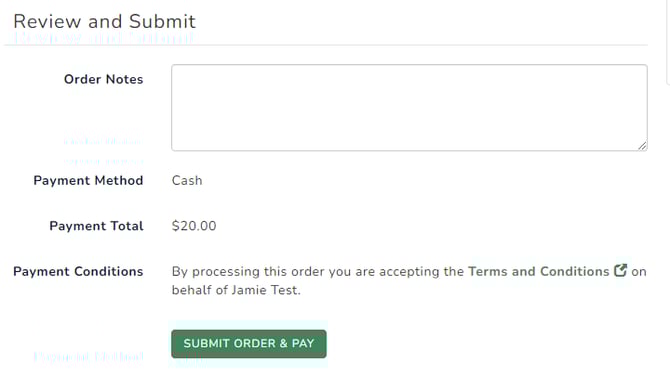
Step 5. Review and Submit: You can leave notes against the order if needed. Once done, hit 'Submit Order and Pay'.
Note: There will be a confirmation email that will be sent to the member with the attached invoice. You can view the orders under the orders menu.
How to purchase items for members/non-members as an admin?
To purchase items for members/non-members, please see the steps below.
Navigate to online store > Create order.
Step 1. Create an Account: Enter the first letter or name, then select ‘+ Create Account’ if the item is for a non-member.
If it's for an existing member or user, their account should appear in the dropdown list—simply select it from there.

There will be a pop-up screen that asks you to provide the details. Once done, hit 'create'.

Step 2. Build Cart: This step mirrors the process of adding a custom product or an existing product, as detailed above.

Step 3. Shipping Method: It's important to note that 'Custom products' do not inherently include a shipping option unless edited within the 'Custom Products Category.' In contrast, standard products prompt for a shipping address if 'delivery' is chosen as the shipping method.
Step 4. Payment Information: Select the payment method and add a discount if needed.

Step 5 . Review and Submit. You can leave notes against the order if needed. Once done, click 'Submit Order & Pay'.
Note: A confirmation email, along with the attached invoice, will be sent to the member. To view the order, you can find it under the 'Orders' menu. To look for the created account, you can view this under security. More details here: Searching for a User