
Important note: Members have the option to mute emails from the Email Campaign module. For more details on this setting, please see the article What a member sees when they login.
To send an Email Campaign, you must first set up the Campaign.
For detailed instructions, see or review past emails sent, you need to click on the Manage icon ![]() next to the Campaign you wish to manage.
next to the Campaign you wish to manage.
From this area of the email campaign module, you can:
- New Email Message or Template
- Compose your message using the editor.
- Managing Email Messages and Templates
- Using Shortcodes
- Send an Email
- Review Past Emails
- See Pending emails
- See Email Campaign Statistics

Add New Email Message or Template
In the upper right corner of your screen, you should see these buttons  .
.
Add Email Message: This option is used when you want to create a one-off email that will be sent immediately or scheduled to a group of recipients.
Add Email Template: This is used to create a reusable email layout or format that can be applied across multiple messages or campaigns. Templates help maintain consistent branding and design.
The fields required to compose a message are the same for both options.- From Email Address - Insert the email address that the Subscribers will see the email is sent from.
- From Name - Insert name of sender.
- Message Subject - Insert the message subject.
- Message - Compose your message using the editor.Please note that the number of short codes may vary depending on whether the campaign is linked or public.

Once you have completed the email, you can select to Preview, or Save & Close.
Please note that the 'Email Template' cannot be sent directly to recipients. However, you will see a option after selecting the preview option, which allows you to generate an email from the template and send it to your recipients.
Managing Email Messages and Templates
The email template will be saved under the Email Templates section, while the email message will be saved under Draft Email Messages.

![]() Edit - Click the Edit icon to edit the email "from" address, subject, and content.
Edit - Click the Edit icon to edit the email "from" address, subject, and content.
![]() Preview and Send – This option is specifically for Email Templates. Review your email message and send a test version to an email address of your choice.
Preview and Send – This option is specifically for Email Templates. Review your email message and send a test version to an email address of your choice.
![]() Clone - You can clone either a draft email, or you can scroll down to past emails and clone them from there.
Clone - You can clone either a draft email, or you can scroll down to past emails and clone them from there. ![]() Delete - To delete an Email Message, click the Delete icon next to the relevant email. Click OK on the pop up to confirm the Deletion.
Delete - To delete an Email Message, click the Delete icon next to the relevant email. Click OK on the pop up to confirm the Deletion.
![]() Create Email - This option is specifically for Email Templates. It allows you to compose a message directly from a template without needing to clone it. Once saved, the message will be stored under the Draft Email Messages section, as the Email Templates section does not have a sending option.
Create Email - This option is specifically for Email Templates. It allows you to compose a message directly from a template without needing to clone it. Once saved, the message will be stored under the Draft Email Messages section, as the Email Templates section does not have a sending option.
![]() Preview – This option is specifically for Email Templates and allows you to view the template before using or editing it. These are the buttons that will appear when previewing the template.
Preview – This option is specifically for Email Templates and allows you to view the template before using or editing it. These are the buttons that will appear when previewing the template.
COMPOSE YOUR MESSAGE, USING THE EMAIL EDITOR
You have a number of options for designing your email message,
- You can design your email using the email editor and using tables
- You can paste one in and email design from another source (see campaign settings for External Source Code)
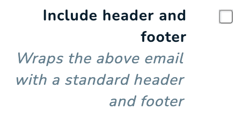
- Or you can just type your message straight into the editor and then have it wrapped with the Standard Header and Footer used in the other Member Jungle automated emails.
USING SHORTCODES IN YOUR EMAIL

Depending on what type of email you are sending, shortcodes may be available to insert in your email email message.
The shortcodes to the right are examples of a membership linked campaign (keep in mind, that the shortcodes will differ depending on the module your campaign is linked to) .
You can insert any of these shortcodes into your email by having your curser in the email message where you would like the code and clicking on the relevant shortcode.
You will see the relevant shortcode will appear in your email in brackets e.g. [[siteurl]].
This code will then automatically populate with the members details or site details when the email is sent.
TESTING, PREVIEWING
- Once you have created an Email Template, Click the Preview/Send icon to view the email template, and send a test email to a chosen email address. Please be aware the preview at the top of the screen will not be the same as the email appears once sent. To preview the email properly, send a test email (as shown below)

SENDING AN EMAIL
You then have a couple of options after you have tested the email, as shown below
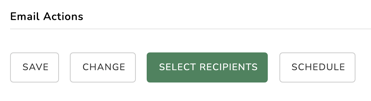
- You can Save the email and return later
- You can click Change to make final edits
- Once you are ready to send, click "Select Recipients" to send the email to subscribers.(You will be taken to a page to select or deselect the receivers before the email is sent)
- Schedule is available as an option for SUBSCRIBER campaigns only. Linked campaigns cannot be scheduled and this option will not appear.
- NOTE: If your campaign is linked to membership, or another module when you click "Select Recipients" you will be able to filter the recipients by their membership type, status etc. To find out more about sending to members click here.
Depending on the number of subscribers in your email campaign (large lists will not display) after you click "Select Recipients" you will be taken to a list of subscribers so you can select who you wish to send the email to.
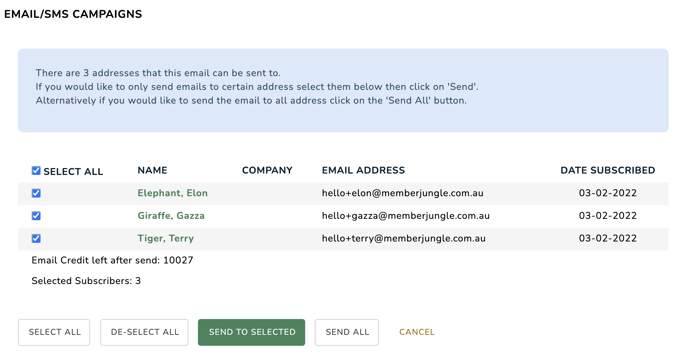
Click the "Select All" button to select all recipients, de-select anyone manually if required and then choose between "Send All" or Send to Selected, depending on your selection. The screen will indicate how many emails are going to be sent out and how many email credits are remaining after the email is sent.
CAMPAIGN EMAILS PENDING
- This section shows a list of the emails that are scheduled and being processed. Sending can take up to 10 minutes, depending on the emails in the queue. Once the email has been sent, it will move automatically from Pending to Sent.

SCHEDULED EMAILS
Emails that have been scheduled to be sent in the future will appear in the Messages and Templates list with details of when they are due to be sent. You can delete or edit this email up until the scheduled time.

CAMPAIGN EMAILS SENT LAST 30 DAYS
- This section shows a list of the emails sent within the last 30 day period, including the date the email was sent. If no campaigns are showing in the last 30 days, click "Show All" to see all emails.
- The Email Campaign name is clickable to view a preview of the email sent.
- % Read;
- This column shows the percentage of sent emails that have been opened by the recipient. See email Campaign Statistics below for more information.
- Clone;
- Click the Clone icon
 to make a cloned copy the campaign.
 - The Cloned Campaign will go into the templates list for you to Send, Edit, Clone or Delete.
- Click the Clone icon
- % Read;
.png?width=688&name=Screen%20Shot%202021-02-01%20at%2012-04-04%20pm-png%20(1).png)
EMAIL CAMPAIGN STATISTICS
You can review a number of different statistics from your email campaigns, including the number of reads, time read and who has and hasn't read the emails. You can view statistics on a Campaign Level as well as on a per-email basis.
Click on Manage next to the campaign you wish to see statistics for,
- For General Campaign Statistics click on the "Click to Show Charts" link under the Campaign Statistics heading. It will show a graph of your subscribers over the last 12 months as well as the number of emails you have sent.
- To view the statistics of an individual emails in this Campaign, click the Statistics icon next to the relevant email. This is at the bottom of the Campaign Emails Sent heading.


- Email Campaign Summary: Displays data about the email campaign, including the date and time the email was sent, the sender’s email address, the total number of recipients, the number of unique first-time opens, and the total number of times the email has been read.
- Email Performance Graphs: Presents visual charts showing the number of emails sent, delivered, and read, along with the specific dates and times when emails were opened.
- Read Emails: Provides a detailed list of recipients who have read the email, including their name, email address, the date and time of reading, and the total number of reads. Click "Show List" to expand the section. You can also view a recipient’s profile by clicking their name.
- Unread or Untraceable Emails: Lists emails that were either not delivered or are untraceable. Click "Show List" to expand this section. You may also click on a recipient's name to view their profile.
- Subscriber Management: At the top of the Statistics page for a public campaign, you can manage your audience by viewing current subscribers, exporting the subscriber list, restoring past subscribers, or accessing a list of former subscribers using the relevant tabs.
- For linked campaigns, only the Subscribers tab is available, which allows you to manually add new subscribers.
Need More Credits?
Your monthly email credits will depend on your current subscription inclusions. If you need to add additional credits to your email campaign module, you can order these here