Run online courses and assessments through your Member Jungle System.
* The course module is an add-on module available to our Member Jungle clients. If you would like to discuss adding this module to your site, please raise a support ticket *
In This Article
- Adding a Course
- Editing Course Form
- Adding a Course Chapter
- Adding Course Questions/Exams
- Add Additional Course Products
- Creating Course Discount Codes
- Issue A Course Certificate
- View and Managing Student Enrolments
- Add a Student
- Course Reporting
- Online Courses from a Students Perspective
Adding a Course
The first step to adding is a course, is firstly creating a role for your students in the security module. You do not need to give any permissions to this role.
Please see roles & permissions article for instructions.
To create a course, you need to be logged in as administrator with the relevant role. Select the Course Module from your list of modules.
- From the left navigation, select Course Admin and then Courses
- If you have existing courses, these will be listed. Below this you will the find the "Add a course" form.

- Course Name: Give your course a name
- Course Price: The cost your students need to pay to join the course. Note: If you have different pricing options for the course it is best to leave this as 0 and add the pricing options into your "additional products".
- Maximum Resits: The number of times a user can resit a course before requiring payment. Leave this empty if you do not wish to allow students to reset their own results.
- Author Name: The name of the course author.
- Percentage Pass Mark: The % result that is considered a pass mark in this course.
- Select the Security Role you want associated with this course: Select the role from the drop down menu, that you set up from step 1. When someone signs up to this course, they will be given this role and any privileges associated with the role.
- Secure Chapter Files: Select whether you would like the files in your chapter secured to students only, or available to the public to view.
- Course Brochure: Upload a brochure for your course.
- Automatically Approve Students: Select whether the students will automatically gain access to the course upon payment, or if they will need to be approved by an administrator.
- Course Manager Email: Include an email for all correspondence for this course. This email address will be notified when the student sign up and complete courses.
- Course Description: Add a full description of the course.
Once you have completed the fields, select "Add Course".
Your course will now display in the list of Courses.

Editing Course Signup Forms
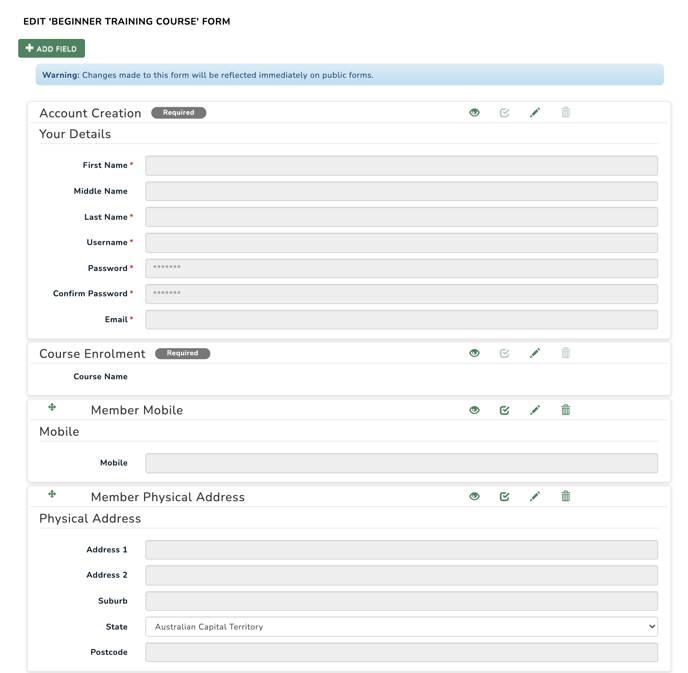
You can custom build the course signup form to collect all required information by clicking on the "Form Fields" icon. Using our standard form builder (as used in Membership, Events and PowerData Form Module), you can "Add Fields", make them as required and drag and drop them around to suit.
Adding Course Chapters
Once you have added your course, you will need to add the course chapters. To do this, select the Chapters icon ![]() next to the course name.
next to the course name.
Complete the form for each chapter of your course

Chapter Name: Give your chapter a name
Author Name: The name of the author of this chapter
Chapter Order: The order in which this chapter will be available to your students
Chapter File: If you wish to upload a file that is relevant to your chapter (eg - a printable copy of the chapter description or a relevant reading material), you can do so here
Chapter Description: The full details of your chapter. This generally includes the chapters reading material for your students.
Once completed, select Add Chapter.
Repeat this step until all of your Course Chapters are added.
Chapters will then need to be activated once completed.
Adding Course Exam/Quiz Questions
Where you have a Chapter that requires the students to complete a quiz, you can add the questions to the relevant Chapter by selecting the ![]() icon for that Chapter.
icon for that Chapter.
Questions are multiple choice.
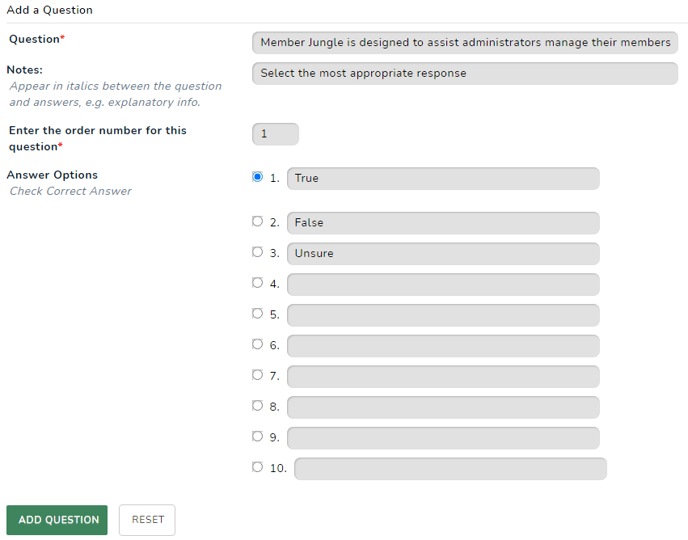
Question: Type the quiz question for your students to answer
Notes: If you have further information, instructions or notes for the student to display with this question, you can add this into this field. It will be displayed in italics under the question.
Enter the Order Number for this Question: This will dictate what order this question is asked to your students.
Answer Options: Add up to 10 options for the multiple choice answer. Click the circle beside the correct answer to highlight that answer in blue.
Once you have completed this, select Add Question.
Repeat this step for all quiz/exam questions for this Chapter.
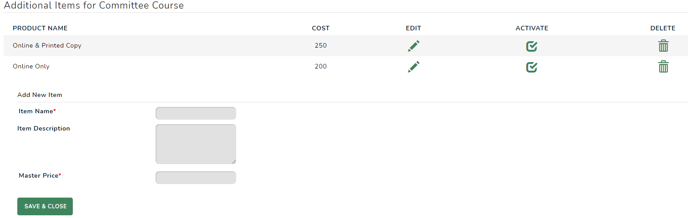
Add Additional Course Products
You have the option to add additional course products for the students at sign up. This can also be used as the pricing of the course if you offer multiple pricing options.
Select the Additional Products  icon beside your chosen course.
These options will be available to students at sign up for this course.
Adding a Course Discount Codes
It is possible to add a discount code to for your students apply to your course at sign up.
To do this, select Discounts from the left navigation, and select Add A Discount.

Complete the form to create your discount code.

- Coupon Code – The name or identifier for the discount.
- Notes – Additional details or remarks about the discount code, if needed.
- Start Date – The date when the discount code becomes active. If left empty, the discount coupon will be usable immediately after it is activated.
- Expiry Date: The date the discount code will no longer work. If left empty, the coupon will remain usable indefinitely until an expiry date is set or it is manually deactivated.
- Restrict to Course: Select which course this discount will apply to. You can select all courses or a single course.
- Applies to Course Products: Select if you would like the discount to be applied to the additional course products.
- Discount Amount: Check either the $ or % and enter the amount in dollars or percentage discount that will apply.
Once completed, ensure you select Save & Close. You will then see the discount listed as inactive. Activate your discount code for this to work according to your settings.

You can identify if a discount applies to both courses and add-on items from the online store by checking for a cart icon next to the discount name. If there is no cart icon, the discount applies to courses only. Also, if the discount is restricted to a specific course, the course name will appear beside the discount code.
You can view how many times each discount code has been redeemed by clicking the number icon in the 'Redeemed' column.

Below are the other icons you may see and their corresponding functions:
![]() Editing a Coupon Code – You can update an existing coupon, such as extending its end date or modifying other details.
Editing a Coupon Code – You can update an existing coupon, such as extending its end date or modifying other details.
![]() Inactive Status of a Coupon – Indicates that the discount code is currently disabled and cannot be used.
Inactive Status of a Coupon – Indicates that the discount code is currently disabled and cannot be used.
![]() Active Status of a Coupon – Indicates that the discount code is enabled and available for use.
Active Status of a Coupon – Indicates that the discount code is enabled and available for use.
![]() Deleting a Discount Coupon – Permanently removes the coupon from the system. This action cannot be undone.
Deleting a Discount Coupon – Permanently removes the coupon from the system. This action cannot be undone.
Issuing a Course Certificate on Completion
Once you have created your course and included a price or additional product, you have the option to activate and edit the certificate of completion that is issued to your students automatically. To activate the certificate, tick the "Issue Certificate" box next to the relevant course.
Course Certificates are custom configured at the time of setting up each customer system and use a custom format to suit your organisation requirements and brand, and can include dynamic course content. If your course certificate is using sub-title fields and footer fields, they are stored against each course. To edit your course certificate content select the edit icon ![]() next to the course name.
next to the course name.
- Certificate Subtitle: Will be displayed under the main heading
- Certificate Footer: Will be displayed under the main body of the certificate
Once you have added these details (optional) scroll to the bottom and select Save & Close to save your changes. You can view and regenerate a course certificate in the Students admin area.

Managing Students & Course Enrolments
You can view the students who have enrolled. To do this, click on the student icon located next to the relevant course.
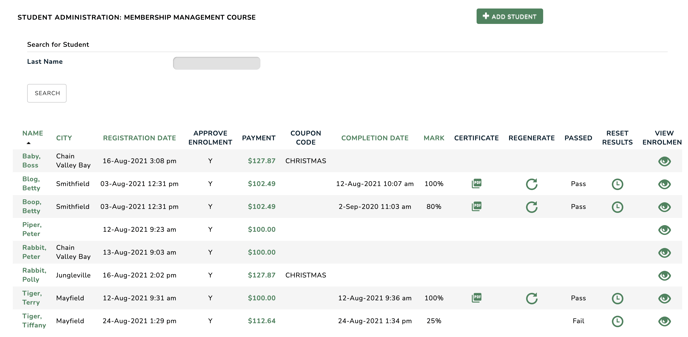 As shown above, the list of enrolled students will appear in a list. From here you can:
- access the student profile by clicking on their name - see User Profile Pop-up
- see registration and enrolment dates.
- approve pending course payments.
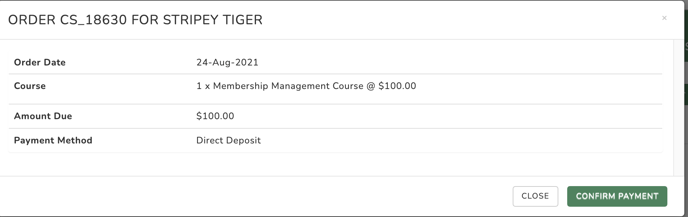
If you have manual payments publicly available, when a student enrols and selects a manual payment method, you will see their enrolment in the list as "Pending" as shown below.
Once the payment is received you can receipt the payment by clicking on the pending payment. A pop-up screen will open, showing you the payment method. To approve the payment, click on the "Confirm Payment" button. The payment will then be marked as paid and the student will receive an email confirming their payment has been received and giving them course access.
- view coupon codes used.
- download course certificates.
- reset students results so they can resit the exam questions.
- view the student enrolment (as shown below).
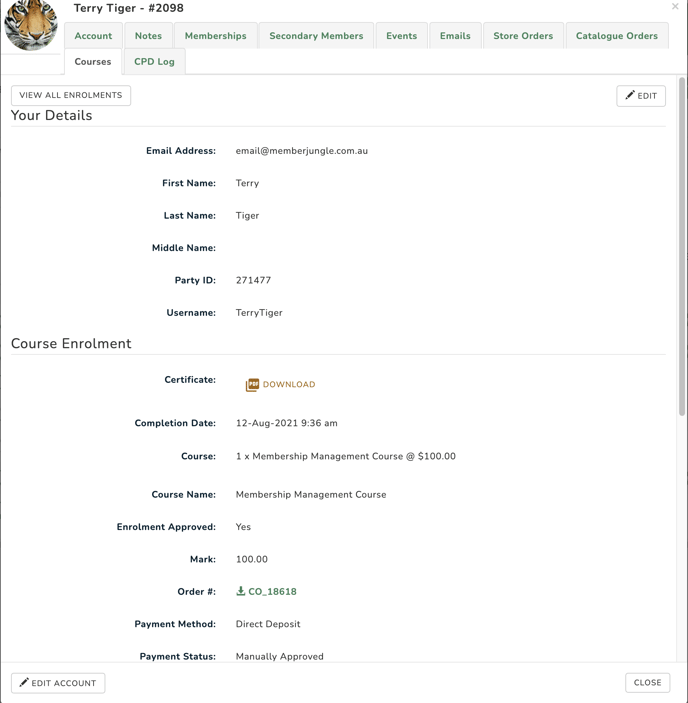
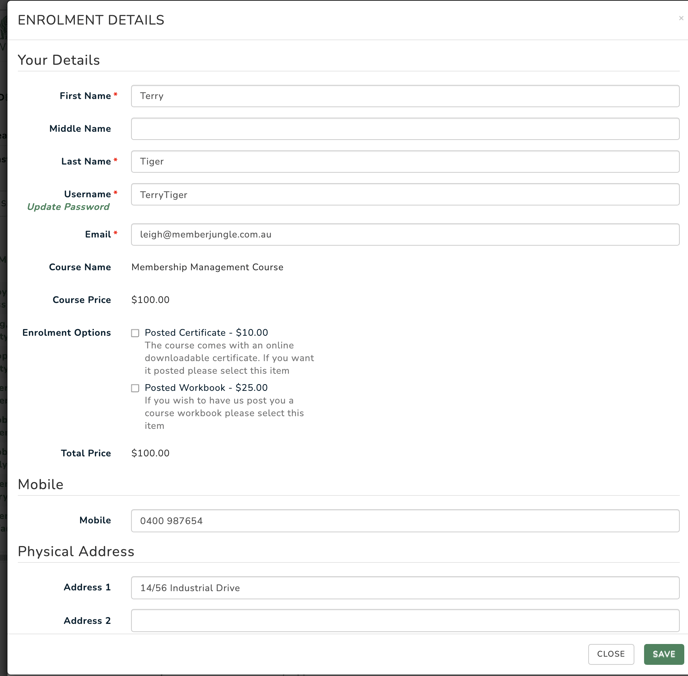
- edit the student's enrolment form (by clicking on the edit in the top right) of the enrolment screen.
Manually Adding a Student
An administrator can manually add a student by clicking on the Students icon beside the course they wish to enrol the person in, and then clicking the "Add Student" button in the top right hand side of the page.
You will be given the option of Enrolling a new student or Enrolling an Existing Student, who already has a user account on the site.

Enrol New Student
To enrol a new student, click on the "Create New User Account" button. You will be required to complete the students details, including a username and password and the rest of the course enrolment form. Select the courses that the student is to be enrolled in and click save.
Enrol Existing Student
If the user already has an account on the site, start typing their name and you will then see their name automatically appear in the dropdown. Click next and then complete the remaining course enrolment fields and click save.
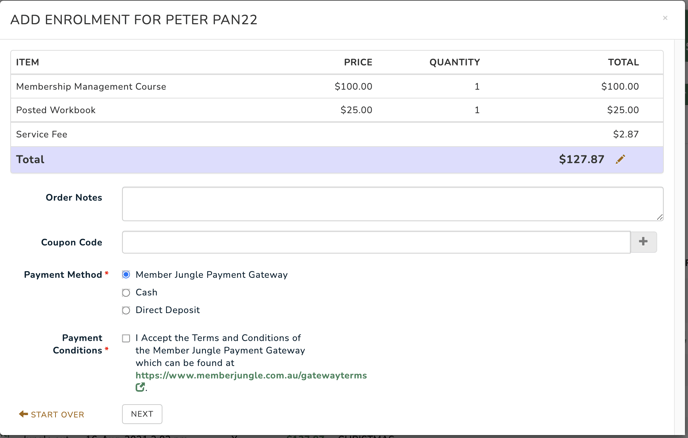
You will then be taken to the payment screen to complete the payment for the enrolment. If you select a manual payment method as an admin, it will automatically mark the payment as received.
Course Reporting
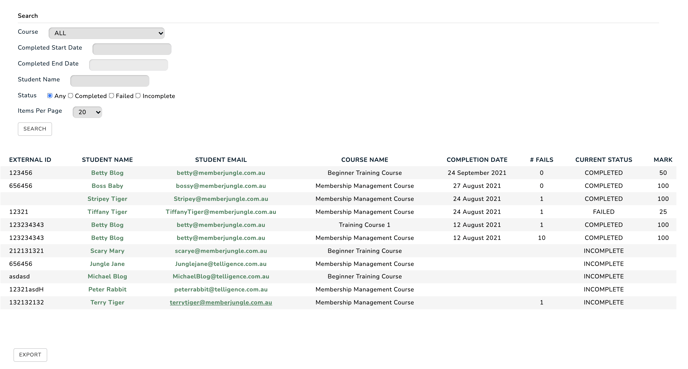
The Enrolment Report will display the details of all students who have enrolled, completed, or failed an online course. Administrators can filter the results by the course, the date window that the student completed the course, the student name and the status of the student's results.
These results are able to be exported to CSV by selecting the Export button at the bottom of the report. All course enrolments will appear in this list, regardless of their status. You can also search for a specific student as well.

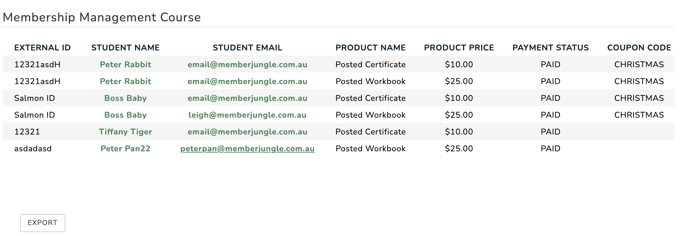
The Product Report is available to display the student's details who have purchased the entry into any online course or additional products. 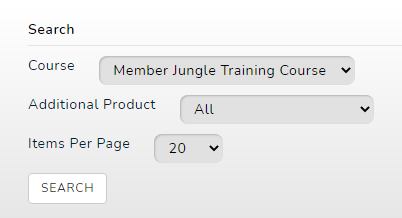
This can be filtered per course and by the available additional products.
This report is able to be exported to CSV by clicking the Export button at the bottom of the report.