
- How the Library Looks on the Website and the Mobile App
- How you can Display Document Categories on a Web page (using widgets)
The Document Management area of your site is used to upload images and documents. A page module is created for the Document Library, which can have Roles assigned to each category, so that the viewers can be customised.
Setting up the Document Library
To create a Document Library, click the Modules tab on the top menu, and select Document Library from the list.
You will need to create a Category prior to uploading your Documents.
Adding a Category
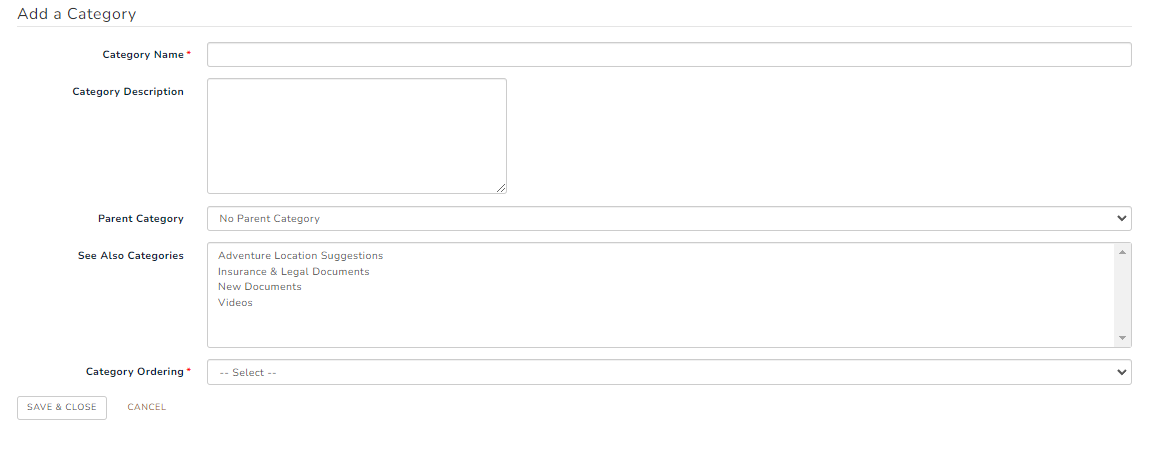
You will need to create a Category for your documents and images.
- Click Categories from the left hand menu.
- Complete the fields in "Add a category".
- You can choose for your Category to be a sub-category of another by selecting the parent category from the drop down list.
- Select how you would like your Categories ordered, and click Save & Close.
- Your Category will then be listed in the Category list.
- The new Category will need to be activated, by clicking the red square next to the Category name, and it will turn green with a tick, to show that it is active.

Edit a Category
- Here you can edit your Category by clicking the Edit icon
 next to your category name.
 - You can change the name, description, Category parent or Category ordering preferences.
- When you have completed your changes, click Save & Close.
Assigning Roles to a Category
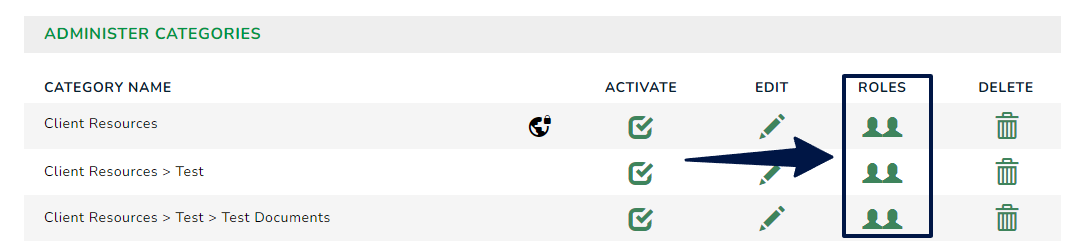
- To assign roles or tags to the Category, select the Roles icon
 next to the relevant category.
 - All Categories are set to Public, by default. This means, that any viewer on your Website can see the document.
- To make the Category viewable by a controlled audience, you must first delete the Role "Public", by clicking the rubbish bin button in the Roles menu.

- Select the roles you wish to have access to the Category from the drop down menu, under "Add Role/ Member Tag". Click Save & Close to add the Users to the list.
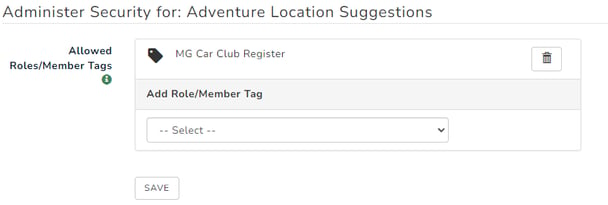
- You can add one, or several User Roles or tags to the Category, as desired.
- You can check the list of Users in each Role or tags, by clicking the Role name in the list. This page will now be accessible by only the Users in this list.

Adding a Document
Now that you have added and activated a Category, you can add documents and images.
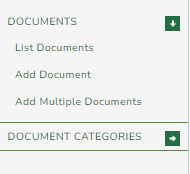
- Click Documents from the left side menu.
- Complete the fields in the "Add Document" section, and select your document to upload.
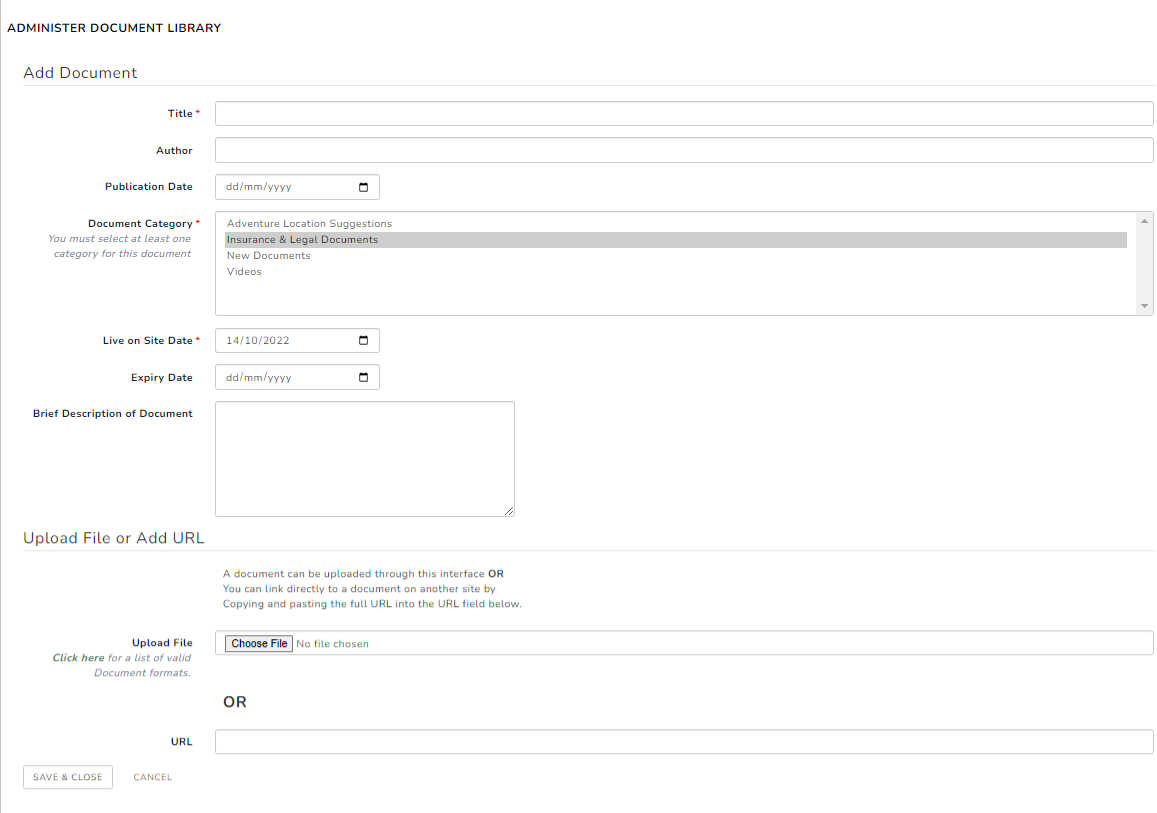
- TIP: To select multiple Document Categories hold down the CTRL or Command key and click on more than one selection.
- You can upload a file or include a URL address for your resource.
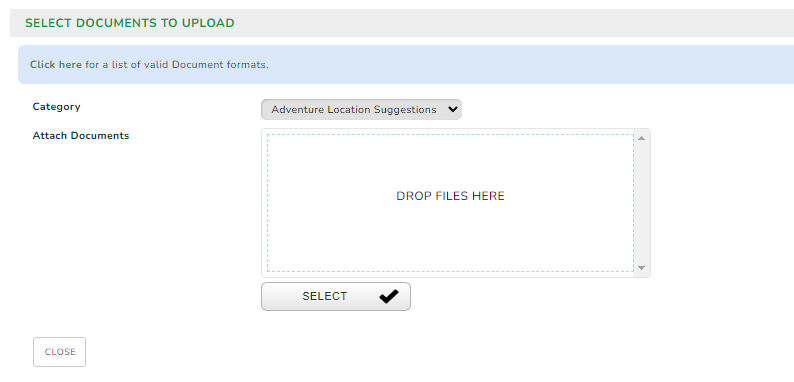
- Valid document formats include; JS, PGN, DOC, PDF, XLS, PPT, ZIP, RTF, TXT, SQL, HTM, HTML, SWF, DOCX, DOCM, XLSX, XLSM, PPTX, PPTM, RSS, CSS, POTX, PSD, AI, JPEG, JPG, PPS, XPS, DWG, WPS, SVG.
- Once you have completed all fields, click Save & Close.
- Your image will then be listed in the Category Documents, and will need to be activated to show in the Documents Library by clicking the red toggle switch next to the image to turn it green, to show it is active.
- Once your document is live you have the option to send out a 'Notify App' which will send the link to the new document to all of your members that have the app on their device. See below.

Uploading Multiple Documents
To add multiple documents or images to a Category, select Upload Multiple Documents from the left menu bar.
- Select the Category you wish to upload the documents to from the list.
- Select your files and images, and click Done.
- You will need to activate the new documents to make them visible in the Document Library.
- Once you have Activated the first Category and documents, this will automatically make a Module Page titled Documents Library.

- When you have uploaded your images and documents, you can view them in the Documents page.
Managing Documents
To manage documents click on LIST DOCUMENTS.
Select the document category from the dropdown list and click SELECT.

You will then see a list of documents in that category and can perform the following actions:
- ACTIVATE: a green tick means the document is viewable. A red tick means the document is not viewable.
- EDIT: edit the document details, change the document category, or upload an updated document to replace the existing document.
- DELETE: permanently delete the document.
- NOTIFY APP: send a notification to all current members with a link to view the document.

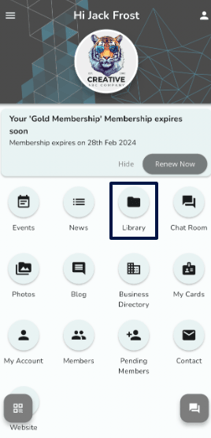
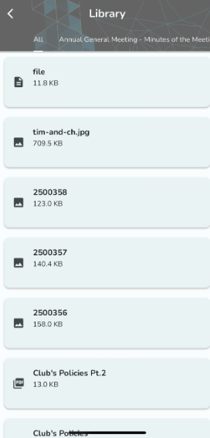
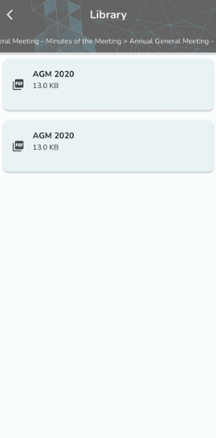
How the Library Looks on the Website and the Mobile App
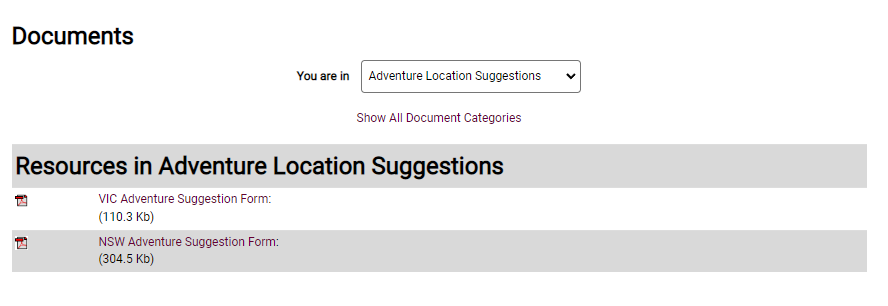
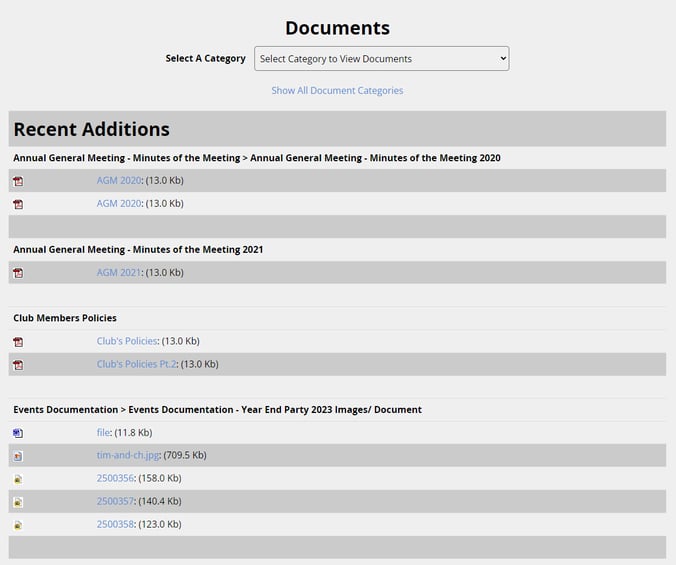
On the website, the Library page is initially displayed with the 'recent additions' documents as the default view. However, you have the option to utilise the dropdown menu to choose a specific category and filter the documents accordingly.
While on the mobile app, you should see a 'Library' menu on your screen, and at the top of the screen, you'll see the available categories.
How you can Display Document Categories on a Web page (using widgets)
To add a document widget, go to Page > click the widget icons > add widget > Libary. You can select a side widget or a center widget depending on your preference. More details here about managing a page : Page Management
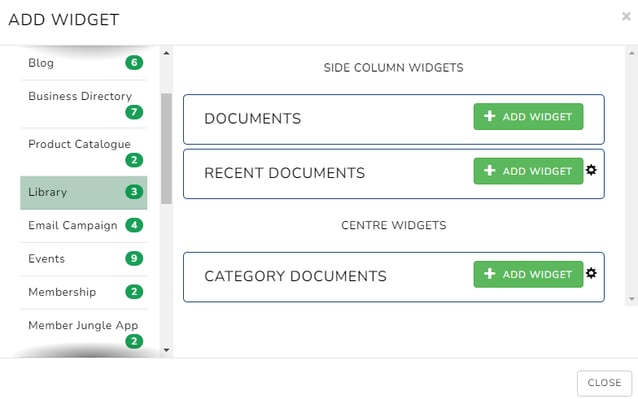
This is what the page looks like after adding a widget. More details here about widgets : Page Widgets
