Member Tag Settings
This setting enables you to create tags seamlessly across your membership, events, and security modules.
Configure Member Tags
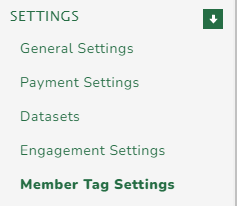
To get started, go to Membership > Settings > Member Tag Settings.

To create a tag, enter the desired tag name in the field under 'Add Available Member Tag' and click the '+' icon to add the tag.

These are the icons that you can see in this setting:
![]() Pen icon: Utilise this icon to edit your existing tags.
Pen icon: Utilise this icon to edit your existing tags.
![]() Bin icon: Utilise this icon to delete existing tags.
Bin icon: Utilise this icon to delete existing tags.
![]() Box icon: Utilise this icon to toggle between activating and deactivating a tag. Green indicates active, while red indicates inactive.
Box icon: Utilise this icon to toggle between activating and deactivating a tag. Green indicates active, while red indicates inactive.
![]() Veggie Burger Icon / Two lines icon: Utilise this arrow to reorder your tags.
Veggie Burger Icon / Two lines icon: Utilise this arrow to reorder your tags.

To display tags on members' profile pop-ups, tick the option 'Display Member Tags'.

Add Member Tags to Your Membership Forms
Now that you have a list of member tags, the next step is to add the member tags field to your relevant membership forms. For full details on managing membership forms, please see this article: Managing Membership Forms.
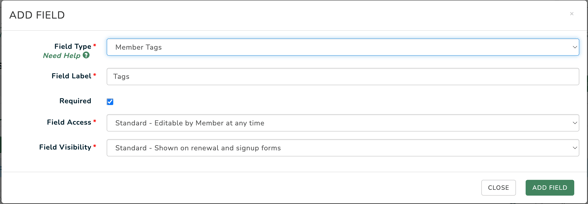
Simply edit your membership form and add the field named 'Member Tags'.

Be sure to configure the 'Field Access' and 'Field Visibility' settings to suit your club. These setting control whether members are able to join or leave tags or only admins are allowed to join or remove members from tags.
Bulk Adding Tags to a Group of Members
You can complete an advanced search in the members area and add or remove tags in bulk.
To find out more about Bulk Editing please visit Bulk Editing Members

Individually Adding Member Tags to a Member
Depending on your 'Field Access' and 'Field Visibility' settings, members will either be allowed to edit their profiles and join any available Member Tags or only club admins will have access to manage which members are assigned to each tag.
In either case, to manage the Member Tags assigned to a member, edit their membership data and adjust the tags.
For more details on how to edit a member's membership data, see this help article: Edit Membership Data.
View Member Tags Assigned to a Member
To view the Member Tags assigned to a member, check out their member profile. To view members' profiles, please see here: Viewing a Member or Person's Profile
Once a member’s membership has expired, the tag will no longer appear in the member pop-up. However, it will remain visible in the member’s membership details from the previous membership cycle.
