This functionality is an add-on feature. Please feel free to raise a support ticket for further assistance.
-
How to set up your Booking System Module
-
General Settings
-
Create Resources
-
-
How People book or make a reservation
- How to edit, cancel, delete a reservation
How to set up your Booking System Module
General Settings
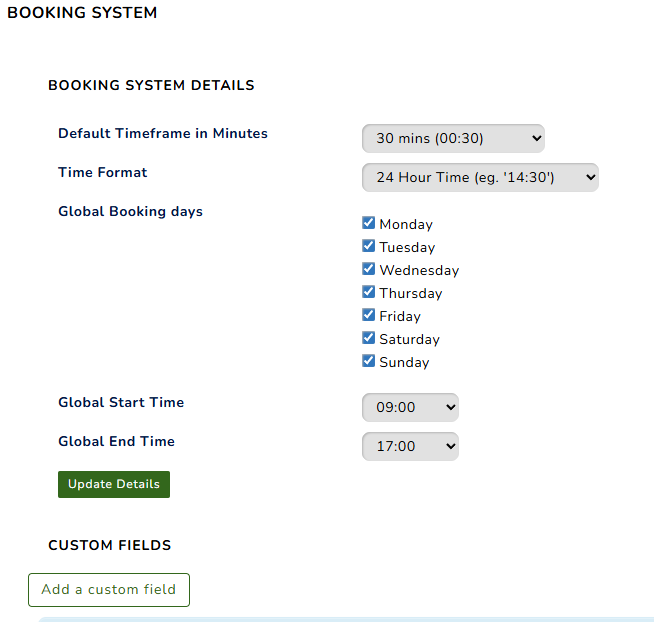
- Default Timeframe in Minutes – Sets the default duration, in minutes, for each booking. For example, entering 60 minutes means each booking will have a default duration of one hour.
-
Time Format – Determines how time is displayed throughout the booking system, such as 12-hour format (e.g., 2:00 PM) or 24-hour format (e.g., 14:00).
-
Global Booking Days – Defines the days of the week when bookings are generally available. These settings apply as the default availability across the booking system.
-
Global Start Time – Sets the default time when bookings can begin on the selected booking days.
-
Global End Time – Sets the default time when bookings can end on the selected booking days.
-
Add a Custom Field – Allows you to create an additional field to collect specific information from users when they make a booking.
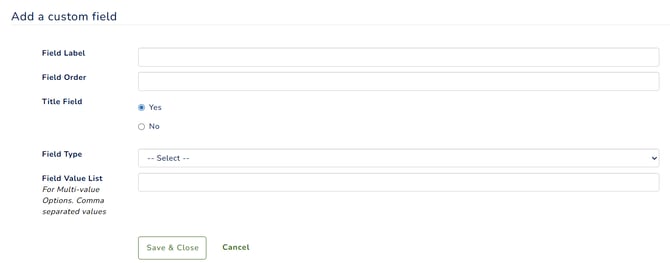
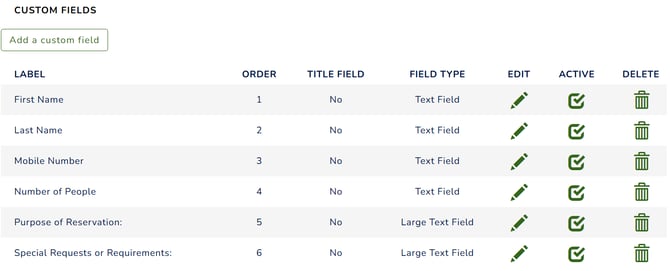
Sample of custom fields
Create Resources
Resources are bookable items or facilities that members or users can reserve through the booking system, such as a room, facility, or piece of equipment.
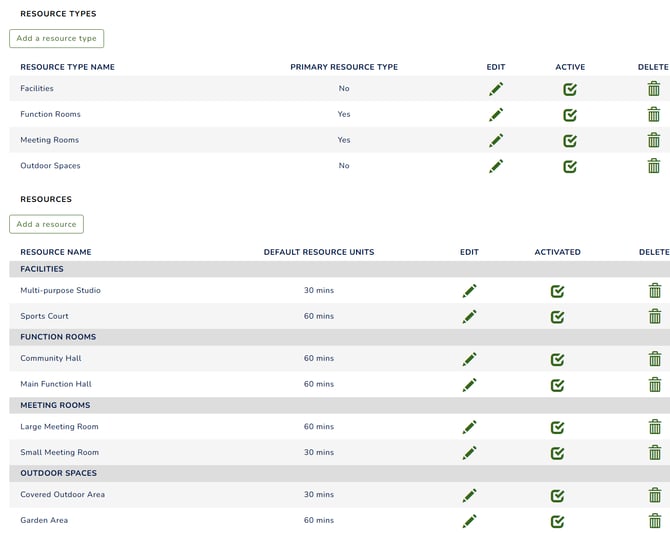
To create a resource type, please click 'Add a resource type.'
-
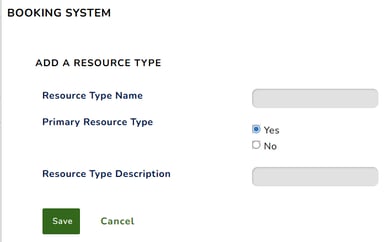
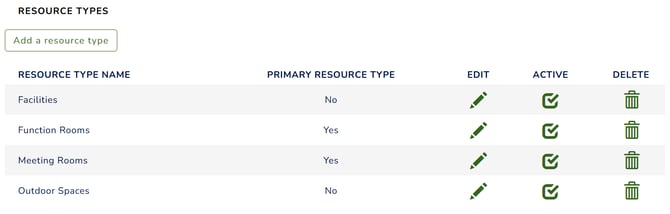
Resource Type: A category used to group similar resources that are available for booking, such as facilities, rooms, or equipment.
-
Primary Resource Type: Selecting Yes means the resource will be displayed at the top of the booking page by default and included in the dropdown options in the left section. Selecting No means the resource will only be displayed under Additional Resources on the page.
-
Resource Type Description: Provides additional information about the resource type.
-
Edit: To make changes to a resource type, click the pen icon.
-
Activate: Resource types are inactive by default when created. To activate a resource type, click the Activate button.
-
Delete: To remove a resource type, click the bin icon.
To create a resource name, please click 'Add a resource.' 
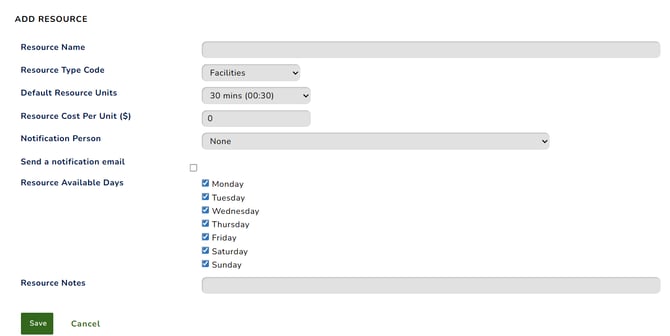
-
Resource Name: The specific resource within a Resource Type that members or users can select and book.
-
Resource Type Code: Used to identify the Resource Name associated with the Resource Type.
-
Default Resource Units: The default duration, in minutes, assigned to the resource for booking purposes.
-
Resource Cost Per Unit ($): The cost charged per unit when a member or user books the resource.
-
Notification Person: The person who will receive notifications when the resource is booked or when there are updates to a reservation.
-
Send a Notification Email: Tick this option if you would like the system to send a notification email to the selected administrator, who will receive the booking details.
-
Resource Available Days: Specifies the days of the week when the resource is available for booking.
-
Resource Notes: Additional information or instructions about the resource that may be useful to members or administrators.
Add a Booking System Module Page
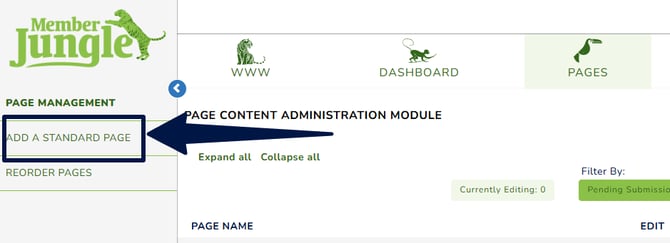
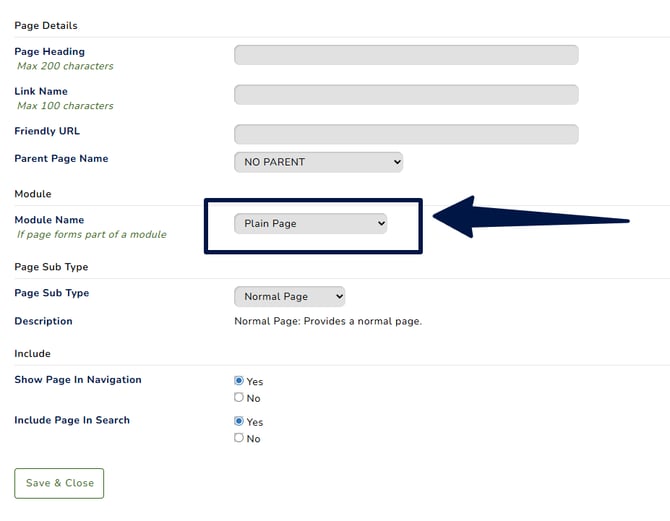
To add a Booking Page, navigate to Pages > Add a Standard Page. Under Module Name, select General Booking System. For more information, please see Add a New Page.
How to generate a Booking Report
The Booking Report allows administrators and authorised users to view and manage a list of bookings made in the booking system. It provides filtering options to help locate bookings based on their booking date, keywords, or specific resources.
This is not a publicly available booking system for the public and general members to create their own bookings. The bookings must be made by administrators only.
The report displays key booking information, including the booking title, reserved resource(s), booking start and end dates/times, and an option to edit or view the booking details.
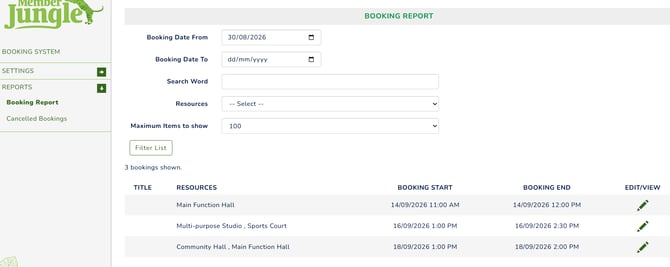
- Booking Date From – Select the starting date for the booking search.
- Booking Date To – Select the ending date for the booking search.
- Search Word – Enter a keyword to search for a specific booking.
- Resources – Select a resource to view bookings associated with that resource.
- Maximum Items to Show – Select the maximum number of bookings displayed in the report.
- Filter List – Click this button to apply the selected filters and display the matching bookings.
Booking Information
- Title – The title or name of the booking.
- Resources – The resource(s) included in the booking.
- Booking Start – The date and time the booking begins.
- Booking End – The date and time the booking ends.
- Edit/View – Click the pencil icon to view or edit the booking details.
Where to find the Cancelled Bookings
The Cancelled Booking Report displays all cancelled bookings in the booking system. It includes filters that allow you to specify a From and To date to view bookings cancelled within a particular date range.
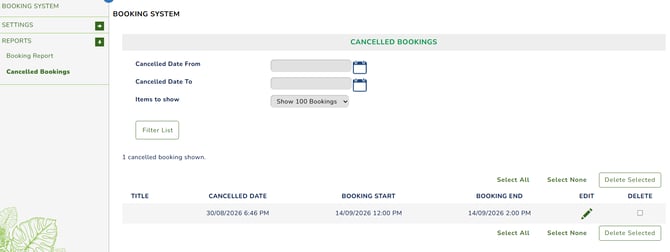
- Title – The title or name of the booking.
- Cancelled Date – The date and time when the booking was cancelled.
- Booking Start – The date and time when the booking starts.
- Booking End – The date and time when the booking ends.
- Edit/View – Click the pcil icon to view or edit the booking details.
- Delete – Select the checkbox next to the booking, then click the Delete Selected button to permanently remove the cancelled booking from the report.
How Admin & Users Make a Booking or Reservation
Members, users, and the public cannot make reservations in the system unless they have the appropriate administrator permissions. For details about roles and permissions, please see below.

-
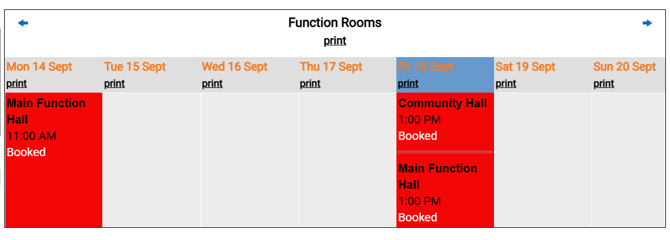
Item Administrator – This permission grants the user full access to the module. They can view all reservation details and make reservations on behalf of members or other users.
-
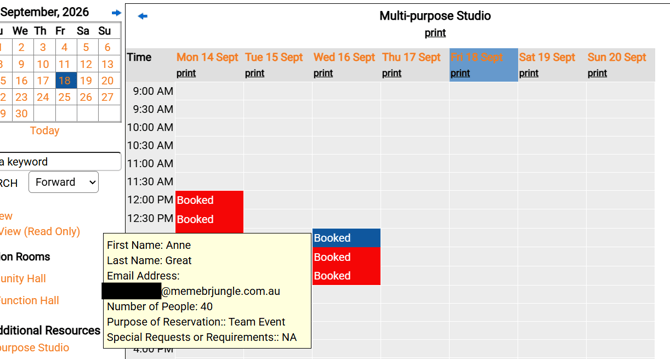
Item Contributor – This permission allows the user to make bookings or reservations. However, they cannot view the details of reservations made by other users. They can only view the details of their own previous bookings. They can also view the availability of resources.
-
Item Viewer – This permission allows the user to view reservation details made by all users. However, they do not have permission to make bookings or reservations.
How to Make a Booking
1. Log in to your account and navigate to your booking page. Your primary resources will appear in the dropdown menu, while non-primary resources will be displayed as Additional Resources.
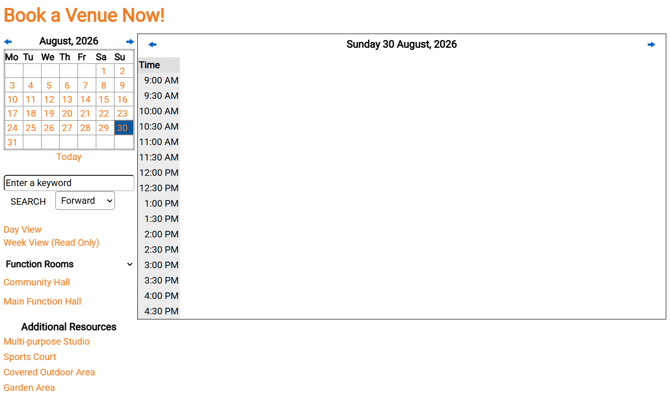
2. Select a date from the calendar in the upper-left section. Primary resources will appear at the top by default. To switch resources, select an available resource from the left section.
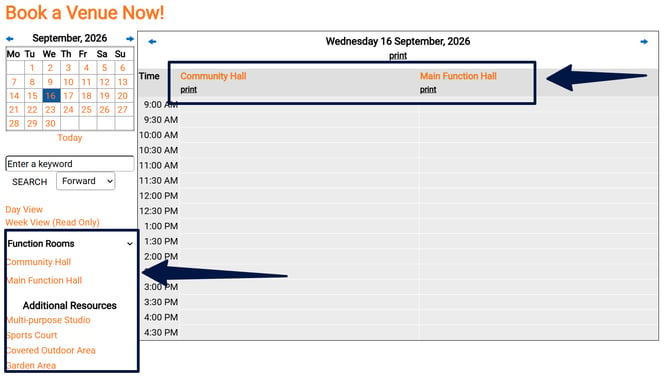
This is an example of the screen when switching between different resources.
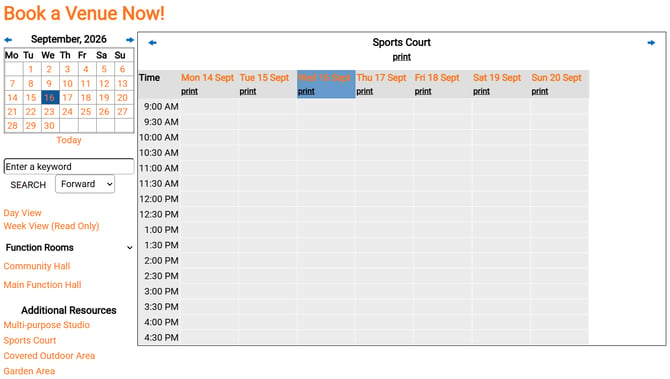
3. Depending on what you see on your screen, select the time under the column for your preferred date.
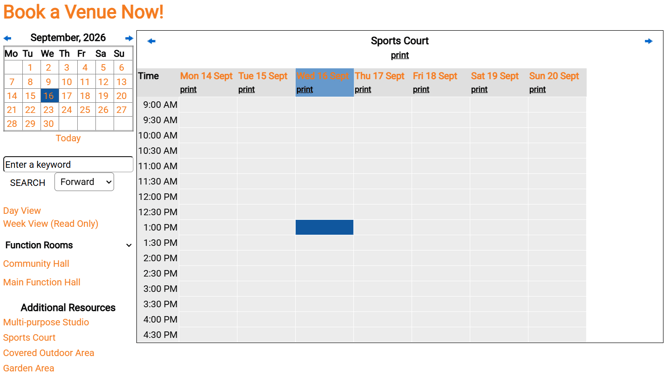 .
.4. From your Booking Screen, select the time range of your reservation. Then, hit the 'Book this period' button.
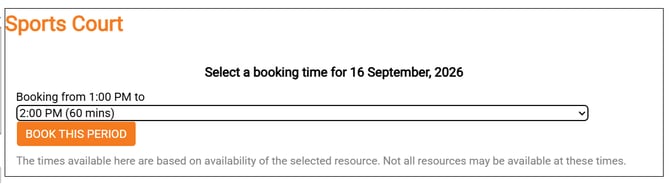
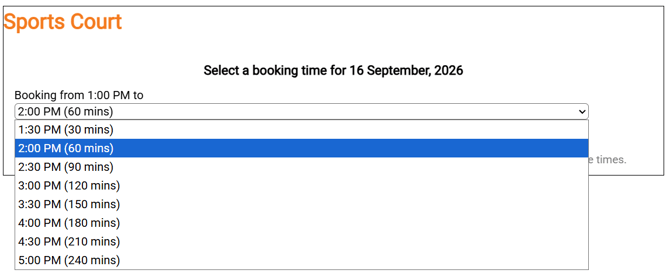
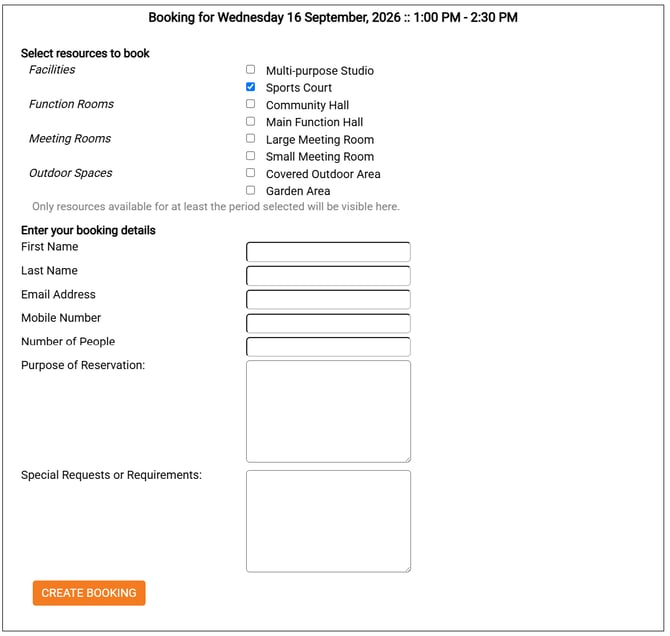
5. Fill in your details. The fields may vary depending on what information your organisation requires. You can also tick the other Resources option if you are booking additional resources for the same time and day. Once done, click Create Booking.
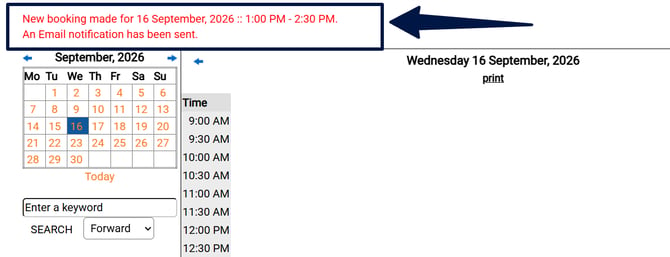
You will see this confirmation message at the top of your screen. The admin will be notified if configured.
How to edit, cancel, or delete a reservation
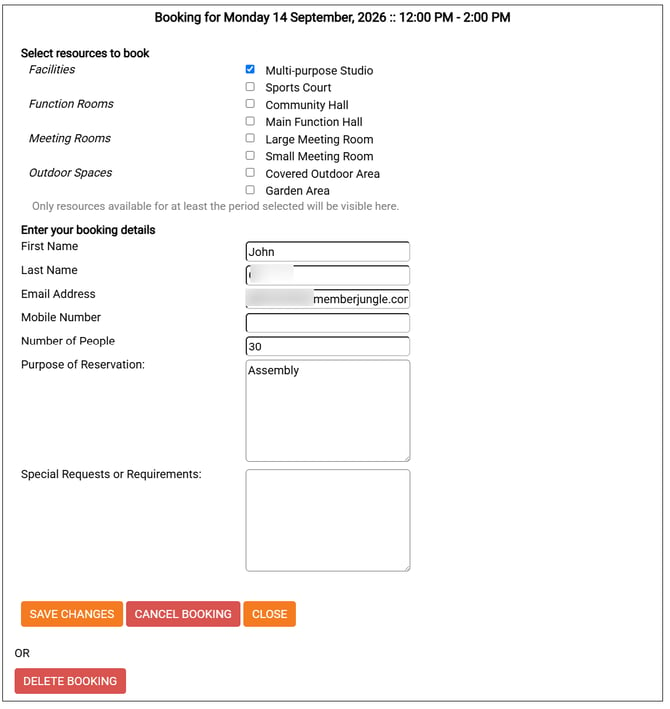
- To edit, cancel, or delete a booking, navigate back to the booking page and locate the booking.
- Click the booking to view the booking details. At the bottom, click the applicable button to edit, cancel, or delete the booking.
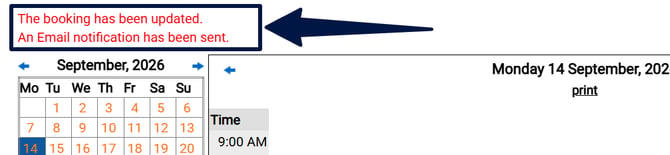
This message will appear to confirm the changes you made.